Exportez votre projet Logic Pro X pour la collaboration
Découvrez comment exporter votre projet Logic Pro X pour collaborer avec d
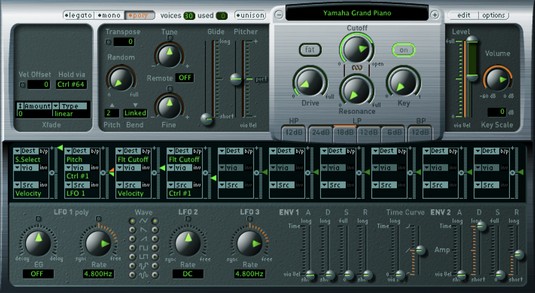
Avec Logic Pro X, vous obtenez tout un tas d'instruments qui pourraient facilement remplacer tous les synthés et claviers que vous possédez. Ils sont puissants et flexibles - et ils ont un son incroyable. De plus, les synthés de Logic Pro peuvent sembler intimidants à programmer lorsque vous examinez tous les contrôles et paramètres que vous pouvez régler. Ici, vous obtenez une visite guidée des interfaces et des paramètres de l'instrument. Découvrez une démonstration vidéo plus détaillée de ce que ces synthés Logic Pro peuvent faire , où vous voyez comment fonctionnent les synthétiseurs et comment utiliser ces synthés Logic Pro dans votre musique.
Pour lire les synthés Logic Pro, vous devez créer une piste d'instrument logiciel et sélectionnez l'instrument à partir de la bande de canaux fente d'instrument comme suit:
Choisissez Piste → Nouvelle piste d'instrument logiciel (ou appuyez sur Option-⌘ -S).
Une nouvelle piste d'instrument logiciel est ajoutée à la liste des pistes.
Choisissez Affichage → Afficher l'inspecteur (ou appuyez sur I).
L'inspecteur s'ouvre à gauche de la liste des pistes.
Cliquez sur le côté droit de l'emplacement d'instrument et choisissez l'instrument que vous voulez.
L'interface de l'instrument logiciel s'ouvre.
Avant de commencer la visite de la fabuleuse collection de synthés de Logic Pro, il est important de comprendre quelques termes de synthèse de base :
Le synthétiseur FM EFM1 obtient des sons comme le Yamaha DX7 classique des années 80, l'un des synthétiseurs numériques les plus populaires de tous les temps. L'EFM1 utilise la synthèse FM ( modulation de fréquence ) pour obtenir des sons numériques tels que des pianos électriques, des cloches, des orgues, des basses et d'autres sons cool et complexes. L'EFM1 est capable de jouer 16 voix simultanées et, contrairement au DX7, est facile à programmer.
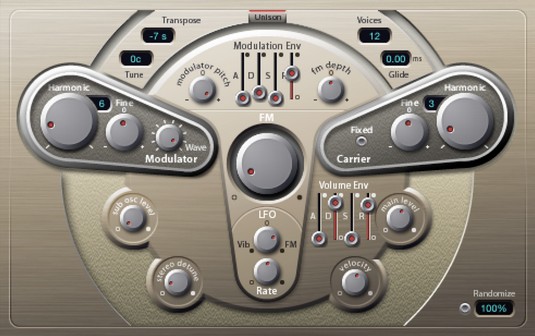
Le synthé FM EFM1.
Pour concevoir des sons avec la synthèse FM, vous définissez les paramètres du modulateur et de la porteuse, puis modifiez l'intensité FM. Les rapports d'accord entre le modulateur et la porteuse définissent les harmoniques. L'intensité FM règle le niveau des harmoniques. Voici une description des paramètres EFM1 :
Cliquez sur le bouton Randomize en bas à droite de l'interface EFM1 pour créer des sons aléatoires. Ajustez la quantité de randomisation en cliquant sur le champ Randomize et en définissant le pourcentage de randomisation. Si vous aimez les sons numériques fous, la randomisation à 100 pour cent est votre meilleur ami.
Vous n'avez pas besoin d'être un génie de la programmation pour obtenir de superbes sons avec les synthétiseurs de Logic Pro. Chaque synthé est livré avec un menu de préréglages en haut de l'interface. Chargez un son que vous aimez, tournez quelques boutons et amusez-vous. Sous le menu prédéfini se trouvent d'autres boutons utiles tels que Copier, Coller, Annuler et Rétablir. Le bouton Comparer vous permet de comparer vos paramètres modifiés avec les paramètres enregistrés afin que vous puissiez modifier autant que vous le souhaitez mais toujours revenir à votre point de départ.
Le synthétiseur ES1 crée des sons en utilisant la synthèse soustractive, dans laquelle vous commencez avec un oscillateur et un sous-oscillateur, puis soustrayez des parties du son pour le façonner. L'ES1 est calqué sur les synthés analogiques classiques et est idéal pour créer des basses, des leads, des pads et même des sons de percussion.
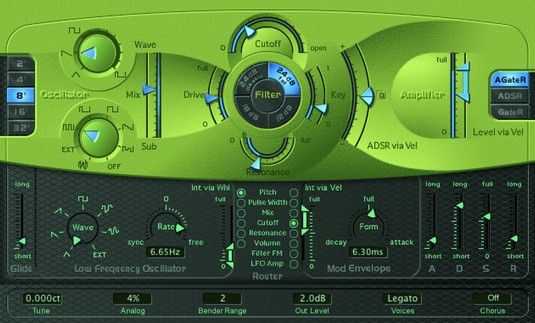
The ES1 subtractive synth.
A description of the ES1 parameters follows:
The ES1 is a great instrument to use for getting the feel of analog synthesis. Many of the synths that follow have similar parameters. Getting the hang of setting oscillator waveforms, filters, envelopes, and modulators will help you take command of the synths and design your own sounds.
Some of these software instruments haven’t had their interfaces updated since Apple introduced hardware Retina displays, which are capable of extremely smooth and crisp graphics. The consequence is fuzzy graphics with controls and text that can be difficult to read. At the top right of the software instrument is a View pop-up menu that can change the size of the window. If you’re having trouble seeing something, make the window bigger.
The ES2 is like a combined EFM1 and ES1 synth plus another type of synthesis called wavetable synthesis. A wavetable is made up of many different waveforms that evolve from one to another or blend at once, creating complex digital sounds. Although the ES2 can produce sounds similar to the EFM1 and ES1, it shines at creating pads, sonic textures, and synthetic sounds that evolve over time.
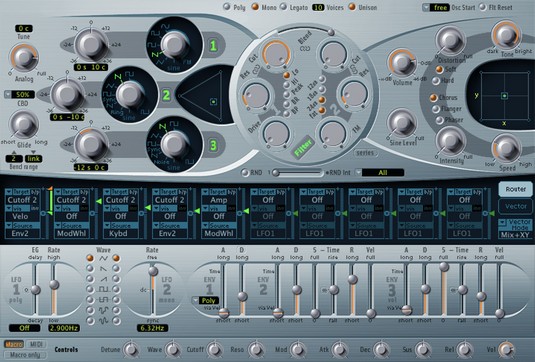
The ES2 hybrid synth.
Check out the the unique features of the ES2:
The ES2 hybrid synth can be used in surround mode to pan your sound throughout the surround spectrum if you’re monitoring your Logic Pro project in surround sound. Logic Pro designers have seemingly thought of everything. To get to the surround parameters, click the disclosure triangle at the bottom of the ES2 interface to display the advanced parameters.
The ES E synth is a lightweight, eight-voice subtractive synth. The E in its name stands for ensemble, and the ES E is great for warm pads such as analog brass and strings. Best of all, it’s much easier to program than the ES1 or ES2.
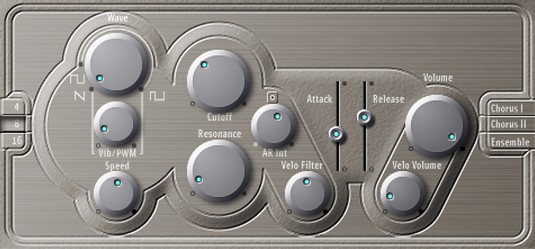
The ES E ensemble synth.
Here’s a description of the ES E parameters:
The ES M is another lightweight subtractive synth. The M stands for mono, which means the ES M can play only one note at a time. Monophonic synths such as the ES M are perfect for bass and lead sounds. Like the ES E, the ES M is simple to program and features a stripped-down set of controls. Both the ES E and ES M are great instruments for learning the basics of synthesis.
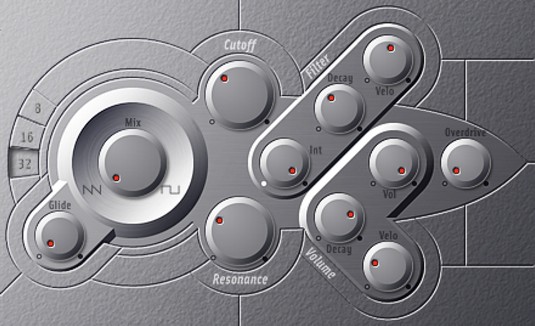
The ES M monophonic synth.
A description of the ES M parameters follows:
Click the disclosure triangle at the bottom of the interface to view the extended parameters. You can adjust the pitch bend amount and fine-tuning in this area.
The ES P is another lightweight subtractive synth. The P stands for polyphonic; you can play eight voices at once. The ES P is modeled after classic 80s synths and does a great job of creating analog pads, bass, and brass sounds.
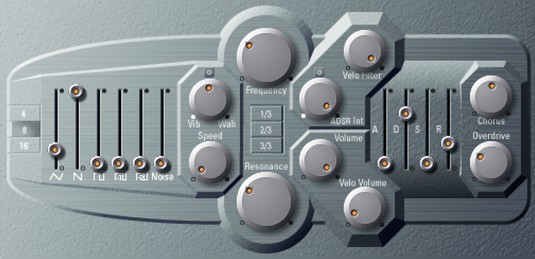
The ES P polyphonic synth.
Here’s a description of the ES P parameters:
Le poly synthé EVOC 20 est un vocodeur et un synthétiseur à 20 voix. Un vocodeur (encodeur vocal) prend un signal audio entrant, généralement une voix, et applique ce signal au synthétiseur, créant un synthétiseur vocal hybride. Cependant, une voix n'est pas la seule chose que vous pouvez utiliser comme entrée. Vous pouvez entrer une boucle de batterie ou un instrument dans le synthétiseur ou exécuter le synthé sans aucune entrée en tant que synthétiseur autonome.
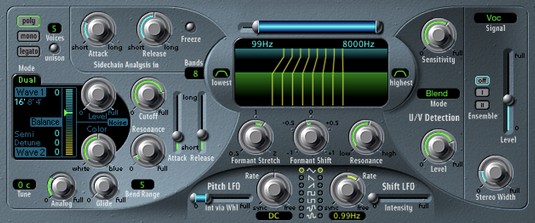
Le synthé vocodeur EVOC 20.
Pour utiliser l'EVOC 20 PS comme vocodeur classique, procédez comme suit :
Dans le menu Side Chain de l'en-tête du plug-in EVOC 20 PS, choisissez la source d'entrée.
La source peut être une entrée live, une piste audio ou un bus. L'effet vocodeur classique utilise une entrée live ou une piste vocale préenregistrée.
Coupez le son de la source d'entrée pour n'entendre que la sortie de l'EVOC 20 PS.
Jouez sur votre contrôleur MIDI simultanément avec la source d'entrée.
L'EVOC 20 PS synthétise votre source d'entrée.
Voici une brève description de quelques paramètres importants de l'EVOC 20 PS :
Vous obtiendrez d'excellents résultats si votre source d'entrée est un volume constant avec beaucoup de contenu à haute fréquence. Assurez-vous que le volume de votre source d'entrée ne varie pas trop. Vous pouvez également égaliser la source d'entrée pour amplifier le contenu des hautes fréquences.
Découvrez comment exporter votre projet Logic Pro X pour collaborer avec d
Logic Pro X n'est pas seulement un séquenceur audio/MIDI. Vous pouvez également importer une vidéo et ajouter votre propre musique de film. La notation de films et de séries télévisées avec Logic Pro X est intuitive et vous constaterez que l'ajout de films à votre projet est simple. Ajouter un film à votre projet Vous pouvez ajouter des films QuickTime à votre projet en […]
Les périphériques MIDI peuvent inclure des claviers, des pads de batterie, des contrôleurs alternatifs tels que des systèmes MIDI de guitare, etc. Bien que vous n'ayez pas besoin d'un contrôleur MIDI pour faire de la musique avec Logic Pro, c'est beaucoup plus amusant si vous avez un moyen de jouer des instruments logiciels. Et les joueurs entraînés peuvent utiliser leurs compétences pour saisir de la musique […]
L'essentiel de l'arrangement et de l'édition de Logic Pro consistera probablement à travailler avec des régions dans la zone des pistes. Ici, vous découvrez les bases de l'édition de régions. Glisser, déplacer et redimensionner des régions Les régions peuvent être glissées vers différents emplacements sur la timeline. Ils peuvent également être déplacés entièrement sur différentes pistes, et ils peuvent […]
Si vous prévoyez d'enregistrer de l'audio à partir d'un microphone ou d'un instrument, vous aurez besoin d'un moyen d'obtenir l'audio dans Logic Pro. Votre Mac a probablement une entrée de ligne ou un microphone intégré. Bien que ceux-ci puissent fonctionner à la rigueur, les enregistrements professionnels nécessitent des périphériques d'entrée de meilleure qualité. La documentation de la plupart du matériel professionnel vous montrera […]
Le réglage de la fréquence d'échantillonnage de votre projet est l'une des premières choses que vous devez faire avant de commencer à enregistrer de l'audio. Si votre projet se compose uniquement d'instruments logiciels et MIDI, vous pouvez modifier la fréquence d'échantillonnage à tout moment. Mais lorsque l'audio est inclus dans votre projet, la modification de la fréquence d'échantillonnage nécessitera que votre audio […]
Lorsque vous créez votre projet dans Logic Pro X, il est automatiquement enregistré dans le dossier Logic sous le nom temporaire Untitled.logicx. (Vous pouvez accéder au dossier Logic dans le Finder en accédant à Users→USERNAME→Music→Logic.) Pour enregistrer votre projet manuellement, choisissez File→Save. Dans la boîte de dialogue Enregistrer qui apparaît, nommez votre projet et choisissez un emplacement ou […]
Les rectangles arrondis dans votre zone de pistes sont appelés régions. Considérez les régions comme des espaces réservés flexibles pour vos données audio et MIDI. Les régions peuvent être vides, attendant que vous ajoutiez du contenu, ou créées lorsque vous enregistrez un nouveau contenu. Les régions sont des références à vos données MIDI et audio. Ils peuvent même référencer une référence, permettant […]
Comme pour les prises audio, vous pouvez enregistrer plusieurs prises MIDI pour créer une prise parfaite. La création d'une prise composite finale à partir de plusieurs prises s'appelle la compilation. Pour créer un dossier de prises lors de l'enregistrement en mode cycle, vous devez d'abord choisir Enregistrer → Options d'enregistrement MIDI → Créer des dossiers de prises. Les options d'enregistrement MIDI définiront le comportement de votre projet […]
L'échantillonneur Logic Pro EXS24 lit des fichiers audio appelés échantillons. Les échantillonneurs sont utiles pour recréer des instruments acoustiques car vous lisez des fichiers audio enregistrés. Mais vous pouvez également échantillonner des sons synthétiques ou modifier des échantillons acoustiques jusqu'à ce qu'ils ne soient plus reconnaissables pour créer des sons uniques avec Logic Pro X. Ici, vous apprenez à utiliser […]


