Power Automate si applica a ogni azione nei flussi di lavoro

Scopri l
Quando si programma in Python , avere un cheat sheet affidabile al proprio fianco può essere un punto di svolta. Python può essere noto per la sua semplicità e leggibilità, ma non si può negare che la sua vasta gamma di caratteristiche e funzionalità è troppo da memorizzare!
I cheat sheet di Python servono come utile riferimento sia per i principianti che per gli sviluppatori esperti. Forniscono una guida di riferimento di base per vari comandi, sintassi, strutture di dati e altro ancora.
Questa guida è un cheat sheet di Python che può aiutarti a navigare attraverso varie funzioni , librerie, classi e sintassi che possono essere travolgenti, soprattutto per i principianti.

Sei della vecchia scuola? Preferisci scaricare e stampare, controlla il pdf qui sotto per aiutarti nel tuo viaggio di apprendimento di Python!
Sommario
Riferimento rapido per le nozioni di base sulla sintassi di Python
Per dare il via al nostro cheat sheet di Python, esploreremo alcune nozioni di base sulla sintassi di Python. Avere una solida conoscenza delle basi di Python ti fornirà una solida base per scrivere codice più complesso.
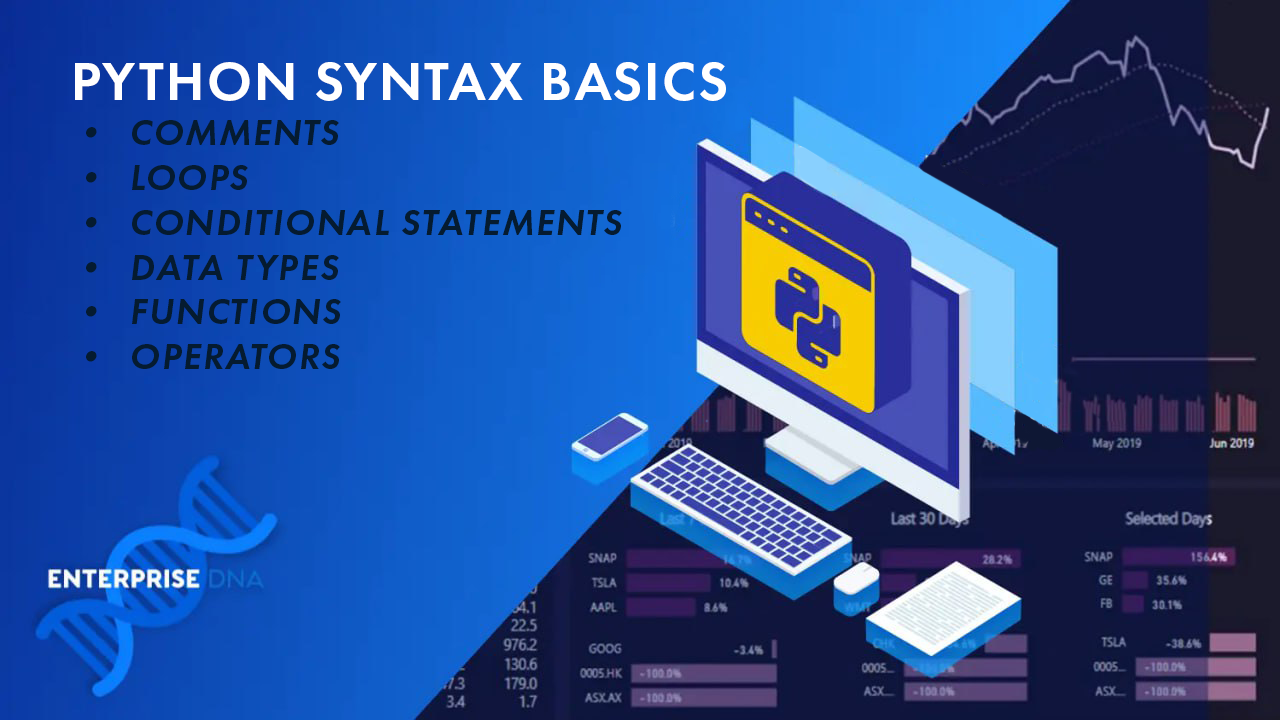
Per questo riferimento, abbiamo incluso: commenti , variabili , tipi di dati , istruzioni condizionali , loop e funzioni .
1. Commenti
I commenti sono una parte importante del tuo codice, poiché ti consentono di spiegare il tuo processo di pensiero e rendere il tuo codice più leggibile. In Python, puoi creare commenti a riga singola usando il simbolo cancelletto (#).
# This is a single-line comment.
Per i commenti su più righe, puoi utilizzare le virgolette triple (singole o doppie).
""" This is a
multi-line
comment. """
2. Variabili
Le variabili in Python vengono utilizzate per memorizzare i dati. È possibile assegnare valori alle variabili utilizzando il segno di uguale (=).
x = 5
name = "John"
I nomi delle variabili devono essere descrittivi e seguire la convenzione di denominazione che prevede l'uso di lettere minuscole e caratteri di sottolineatura per gli spazi.
user_age = 25
favorite_color = "blue"
3. Tipi di dati
Il linguaggio Python viene fornito con diversi tipi di dati incorporati per impostazione predefinita. Alcuni dei più comuni includono:
Tipi di testo : str
Tipo booleano : bool
Tipi numerici : int, float, complex
Tipi di sequenza : lista, tupla, intervallo
Nessuno Tipo: Nessunotipo
Per scoprire il tipo di dati di qualsiasi oggetto Python, puoi usare la funzione type() . Per esempio:
name = 'jane'
print(type(name))

#Output: 'str'
4. Dichiarazioni condizionali
Le istruzioni condizionali in Python consentono di eseguire il codice solo quando vengono soddisfatte determinate condizioni. Le istruzioni condizionali comuni sono ' if ', 'elif ' e ' else '.
if condition:
    # Code to execute if the condition is true
elif another_condition:
    # Code to execute if the another_condition is true
else:
    # Code to execute if none of the conditions are true
5. Cicli
Un ciclo viene utilizzato per eseguire ripetutamente un blocco di codice. Python ha due tipi di cicli: un ciclo ' for ' e un ciclo ' while '.
Diamo un'occhiata a entrambi:
Per i loop:
for variable in iterable:
    # Code to execute for each element in the iterable
Ciclo while:
while condition:
    # Code to execute while the condition is true
All'interno di questi cicli, puoi usare istruzioni condizionali e di controllo per controllare il flusso del tuo programma.
6. Funzioni
Functions in Python are blocks of code that perform specific tasks. You can define a function using the ‘def‘ keyword, followed by the function name and parentheses containing any input parameters.
def function_name(parameters):
    # Code to execute
    return result
To call a function, use the function name followed by parentheses containing the necessary arguments.
function_name(arguments)
Now that we’ve gone over the Python basics, let’s move on to some more advanced topics in the next section.
Quick Reference for Python Data Structures
Next in our Python cheatsheet, we’ll discuss some of the most commonly used data structures in Python. These data structures are essential in managing and organizing the data in your programming projects.
There are many data structures in Python that advanced developers can use. However, we’ll focus on Lists, Tuples, Sets, and Dictionaries.
1. Lists
A list in Python is a mutable, ordered sequence of elements. To create a list, use square brackets and separate the elements with commas.
Python lists can hold a variety of data types like strings, integers, booleans, etc. Here are some examples of operations you can perform with Python lists:
Create a list:
my_list = [1, 2, 3]Access elements:
my_list[0]Add an element:
my_list.append(4)2. Tuples
A tuple is similar to a list, but it is immutable, which means you cannot change its elements once created. You can create a tuple by using parentheses and separating the elements with commas.
Here are some examples of tuple operations:
Create a tuple:
my_tuple = (1, 2, 3)Access elements:
my_tuple[0] #Output: 13. Sets
A set is an unordered collection of unique elements. You can create a set using the set() function or curly braces.
It can also hold a variety of data types, as long as they are unique. Here are some examples of set operations:
Create a set:
my_set = {1, 2, 3}Add an element:
my_set.add(4)Remove an element:
my_set.remove(1)4. Dictionaries
A dictionary is an unordered collection of key-value pairs, where the keys are unique. You can create a dictionary using curly braces and separating the keys and values with colons. Here are some examples of dictionary operations:
Create a dictionary:
my_dict = {'key1': 'value1', 'key2': 'value2'}Access elements:
my_dict['key1'] #Output:'value1'Add a key-value pair:
my_dict['key3'] = 'value3'Remove a key-value pair:
del my_dict['key1']Remember to practice and explore these data structures in your Python projects to become more proficient in their usage! Next, we’re going to give you a reference for file I/O tasks.
Quick Reference for Python File I/O
In this section of the Python cheat sheet, we’ll focus on some common tasks related to working with files in Python, such as reading, writing, and appending data.
1. Reading Files
To read a file, you first need to open it using the built-in open() function, with the mode parameter set to ‘r‘ for reading:
file_obj = open('file_path', 'r')
Now that your file is open, you can use different methods to read its content:
read(): Reads the entire content of the file.
readline(): Reads a single line from the file.
readlines(): Returns a list of all lines in the file.
It’s important to remember to close the file once you’ve finished working with it:
file_obj.close()
Alternatively, you can use the with statement, which automatically closes the file after the block of code completes:
with open('file_path', 'r') as file_obj:
    content = file_obj.read()
2. Writing Files
To create a new file or overwrite an existing one, open the file with mode ‘w‘:
file_obj = open('file_path', 'w')
Write data to the file using the write() method:
file_obj.write('This is a line of text.')
Don’t forget to close the file:
file_obj.close()
Again, consider using the with statement for a more concise and safer way to handle files:
with open('file_path', 'w') as file_obj:
    file_obj.write('This is a line of text.')
3. Appending to Files
To add content to an existing file without overwriting it, open the file with mode ‘a‘:
file_obj = open('file_path', 'a')
Use the write() method to append data to the file:
file_obj.write('This is an extra line of text.')
And, as always, close the file when you’re done:
file_obj.close()
For a more efficient and cleaner approach, use the with statement:
with open('file_path', 'a') as file_obj:
    file_obj.write('This is an extra line of text.')
By following these steps and examples, you can efficiently navigate file operations in your Python applications. Remember to always close your files after working with them to avoid potential issues and resource leaks!
In the next section, we provide a reference for error handling in Python.
Quick Reference for Error Handling in Python

In this section, you’ll learn about error handling in Python, which plays a crucial role in preventing the abrupt termination of your programs when it encounters an error.
We’ll cover the following sub-sections: Try and Except, Finally, and Raising Exceptions.
1. Try and Except
To handle exceptions in your code, you can use the try and except blocks. The try block contains the code that might raise an error, whereas the except block helps you handle that exception, ensuring your program continues running smoothly.
Here’s an example:
try:
    quotient = 5 / 0

except ZeroDivisionError as e:
    print("Oops! You're trying to divide by zero.")
In this case, the code inside the try block will raise a ZeroDivisionError exception. Since we have an except block to handle this specific exception, it will catch the error and print the message to alert you about the issue.
2. Finally
The finally block is used when you want to ensure that a specific block of code is executed, no matter the outcome of the try and except blocks. This is especially useful for releasing resources or closing files or connections, even if an exception occurs, ensuring a clean exit.
Here’s an example:
try:
    # Your code here
except MyException as e:
    # Exception handling
finally:
    print("This will run no matter the outcome of the try and except blocks.")
3. Raising Exceptions
You can also raise custom exceptions in your code to trigger error handling when specific conditions are met. To do this, you can use the raise statement followed by the exception you want to raise (either built-in or custom exception).
For instance:
def validate_age(age):
    if age < 0:
        raise ValueError("Age cannot be a negative value.")

try:
    validate_age(-3)
except ValueError as ve:
    print(ve)
In this example, we’ve defined a custom function to validate an age value. If the provided age is less than zero, we raise a ValueError with a custom message. When calling this function, you should wrap it in a try-except block to handle the exception properly.
Next, we’re going to provide a quick reference for popular Python modules and packages. Let’s go!
Quick Reference for Python Modules and Packages

This section of our cheat sheet is for Python packages and modules, which are essential for structuring and organizing your code cleanly and efficiently.
You’ll learn about importing modules and creating packages.
1. Importing Modules
Modules in Python are files containing reusable code, such as functions, classes, or variables. Python offers several modules and packages for different tasks like data science, machine learning, robotics, etc.
To use a module’s contents in your code, you need to import it first. Here are a few different ways to import a module:
import : This imports the entire module, and you can access its contents using the syntax ‘module_name.content_name.’
For example:
import random

c = random.ranint()
from import : This imports a specific content (function or variable) from the module, and you can use it directly without referencing the module name.
from math import sin

c = sin(1.57)
from import *: This imports all contents of the module. Be careful with this method as it can lead to conflicts if different modules have contents with the same name.
Some commonly used built-in Python modules include:
math: Provides mathematical functions and constants
random: Generates random numbers and provides related functions
datetime: Handles date and time operations
os: Interacts with the operating system and manages files and directories
2. Creating Packages
Packages in Python are collections of related modules. They help you organize your code into logical and functional units. To create a package:
Create a new directory with the desired package name.
Add an empty file named init.py to the directory. This file indicates to Python that the directory should be treated as a package.
Add your module files (with the .py extension) to the directory.
Now, you can import the package or its modules into your Python scripts. To import a module from a package, use the syntax:
import Structure your code with modules and packages to make it more organized and maintainable. This will also make it easier for you and others to navigate and comprehend your codebase.
In the next section, we provide a reference for object-oriented programming concepts in Python.
Quick Reference for Object-Oriented Programming in Python

Object-Oriented Programming (OOP) is a programming paradigm based on the concept of “objects“, which can contain data and code.
The data is in the form of fields, often known as attributes or properties, and the code is in the form of procedures, often known as methods.
In this section of the cheat sheet, we’ll delve into the fundamental concepts of OOP in Python, including classes, inheritance, and encapsulation.
1. Classes
A class is a blueprint for creating objects. It defines the data (attributes) and functionality (methods) of the objects. To begin creating your own class, use the “class” keyword followed by the class name:
class ClassName:
    # Class attributes and methods
To add attributes and methods, simply define them within the class block. For example:
class Dog:
    def __init__(self, name, breed):
        self.name = name
        self.breed = breed

    def bark(self):
        print("Woof!")
In questo esempio, è possibile creare un nuovo oggetto Dog con un nome e una razza, e ha un metodo bark che stampa “ Woof! ” quando chiamato.
2. Ereditarietà
L'ereditarietà consente a una classe di ereditare attributi e metodi da un'altra classe, consentendo la riusabilità e la modularità del codice. La classe che eredita è chiamata sottoclasse o classe derivata, mentre la classe da cui viene ereditata è chiamata classe base o superclasse.
Per implementare l'ereditarietà, aggiungi il nome della superclasse tra parentesi dopo il nome della sottoclasse:
class SubclassName(SuperclassName):
    # Subclass attributes and methods
Ad esempio, potresti creare una sottoclasse "Barboncino" da una classe "Cane":
class Poodle(Dog):
    def show_trick(self):
        print("The poodle does a trick.")
Un oggetto Poodle ora avrebbe tutti gli attributi ei metodi della classe Dog, oltre al proprio metodo show_trick.
3. Incapsulamento
L'incapsulamento è la pratica di avvolgere dati e metodi che operano su tali dati all'interno di una singola unità, un oggetto in questo caso. Ciò promuove una netta separazione tra l'implementazione interna di un oggetto e la sua interfaccia esterna.
Python utilizza il name mangling per ottenere l'incapsulamento per i membri della classe aggiungendo un prefisso con doppia sottolineatura al nome dell'attributo, rendendolo apparentemente privato.
class Example:
    def __init__(self):
        self.__private_attribute = "I'm private!"

    def __private_method(self):
        print("You can't see me!")
Sebbene tu possa ancora tecnicamente accedere a questi membri privati in Python, farlo è fortemente sconsigliato in quanto viola i principi di incapsulamento.
Comprendendo e implementando classi, ereditarietà e incapsulamento nei tuoi programmi Python, puoi utilizzare la potenza e la flessibilità dell'OOP per creare codice pulito, modulare e riutilizzabile.
Per la nostra sezione finale del cheatsheet, ti forniremo un rapido riferimento per quattro popolari librerie Python.
4 utili librerie Python

Diverse librerie Python possono aiutarti a svolgere una varietà di attività o ottenere strumenti per vari argomenti come matematica, scienza dei dati, web scraping, ecc.
In questa sezione, discuteremo brevemente delle seguenti librerie: NumPy , Pandas , Requests e Beautiful Soup .
1. NumPy
NumPy è una popolare libreria Python per il calcolo matematico e scientifico. Con il suo potente oggetto array N-dimensionale, puoi gestire un'ampia gamma di operazioni matematiche, come:
Funzioni matematiche di base
Algebra lineare
Analisi di Fourier
Generazione di numeri casuali
Le efficienti manipolazioni di array di NumPy lo rendono particolarmente adatto a progetti che richiedono calcoli numerici.
2. Panda
Pandas è una potente libreria di analisi e manipolazione dei dati che puoi utilizzare per lavorare con i dati strutturati. È anche molto popolare nella comunità della scienza dei dati grazie all'ampia gamma di strumenti che fornisce per la gestione dei dati.
Alcune delle sue caratteristiche includono:
Strutture dati come Series (1D) e DataFrame (2D)
Pulizia e preparazione dei dati
analisi statistica
Funzionalità delle serie temporali
Utilizzando Pandas, puoi facilmente importare, analizzare e manipolare i dati in una varietà di formati, come database CSV, Excel e SQL.
Se sei interessato a Panda, puoi guardare il nostro video su come ricampionare i dati delle serie temporali utilizzando Panda per migliorare l'analisi:
3. Richieste
La libreria Requests semplifica il processo di gestione delle richieste HTTP in Python. Con questa libreria, puoi facilmente inviare e ricevere richieste HTTP, come GET, POST e DELETE.
Alcune caratteristiche chiave includono:
Gestire i reindirizzamenti e seguire i collegamenti sulle pagine web
Aggiunta di intestazioni, dati del modulo e parametri di query tramite semplici librerie Python
Gestione di cookie e sessioni
Utilizzando le richieste, puoi interagire in modo rapido ed efficiente con vari servizi Web e API.
4. Bella zuppa
Beautiful Soup è una libreria Python per il web scraping, che consente di estrarre dati da documenti HTML e XML. Alcune delle sue caratteristiche principali includono:
Ricerca di tag specifici o classi CSS
Navigazione e modifica di alberi analizzati
Estrazione di informazioni rilevanti in base agli attributi dei tag
Utilizzando Beautiful Soup insieme a Requests, puoi creare potenti applicazioni di web scraping che raccolgono informazioni da una vasta gamma di siti web.
Pensieri finali

E questo ci porta alla fine del nostro breve viaggio lungo Python Lane. Questo cheat sheet è la tua guida tascabile, il tuo fidato compagno per quando hai bisogno di un rapido promemoria delle principali funzioni e comandi di Python.
Il nostro elenco non è esaustivo, ma è un solido inizio, una base su cui costruire. Quindi vai avanti, aggiungilo ai segnalibri, stampalo, attaccalo al muro: assicurati solo che sia a portata di mano quando stai programmando. Buona programmazione!
Scopri l
Tecniche di modellazione dei dati per organizzare meglio le misure DAX per un flusso di lavoro più efficiente.
Scopri come utilizzare la funzione di filtro in Power Apps e come incorporarla nelle formule esistenti all
Come commentare più righe in Python: una guida semplice e veloce
Acquisisci familiarità con i connettori Power Automate per la manipolazione di numeri, testo e date/ore.
Ora, è molto facile studiare il budget rispetto all
Imparerai come salvare e caricare oggetti da un file .rds in R. Questo articolo tratta anche come importare oggetti da R a LuckyTemplates.
Scopri tutto su Power Query e il linguaggio M per la trasformazione e la preparazione dei dati nel desktop di LuckyTemplates.
Cos'è il sé in Python: esempi del mondo reale
In questa esercitazione sul linguaggio di codifica DAX, scopri come usare la funzione GENERATE e come modificare dinamicamente il titolo di una misura.


