Power Automate の文字列関数: Substring と IndexOf
Microsoft フローで使用できる 2 つの複雑な Power Automate String 関数、substring 関数とindexOf 関数を簡単に学習します。
このチュートリアルでは、ワークフローで使用できるPower Automate 論理関数をいくつか見ていきます。これらの関数を使用する場合、 Conditionコネクタは必要ありません。
Power Automate 論理関数は、フロー内でtrue または falseを返す値と式を比較します。
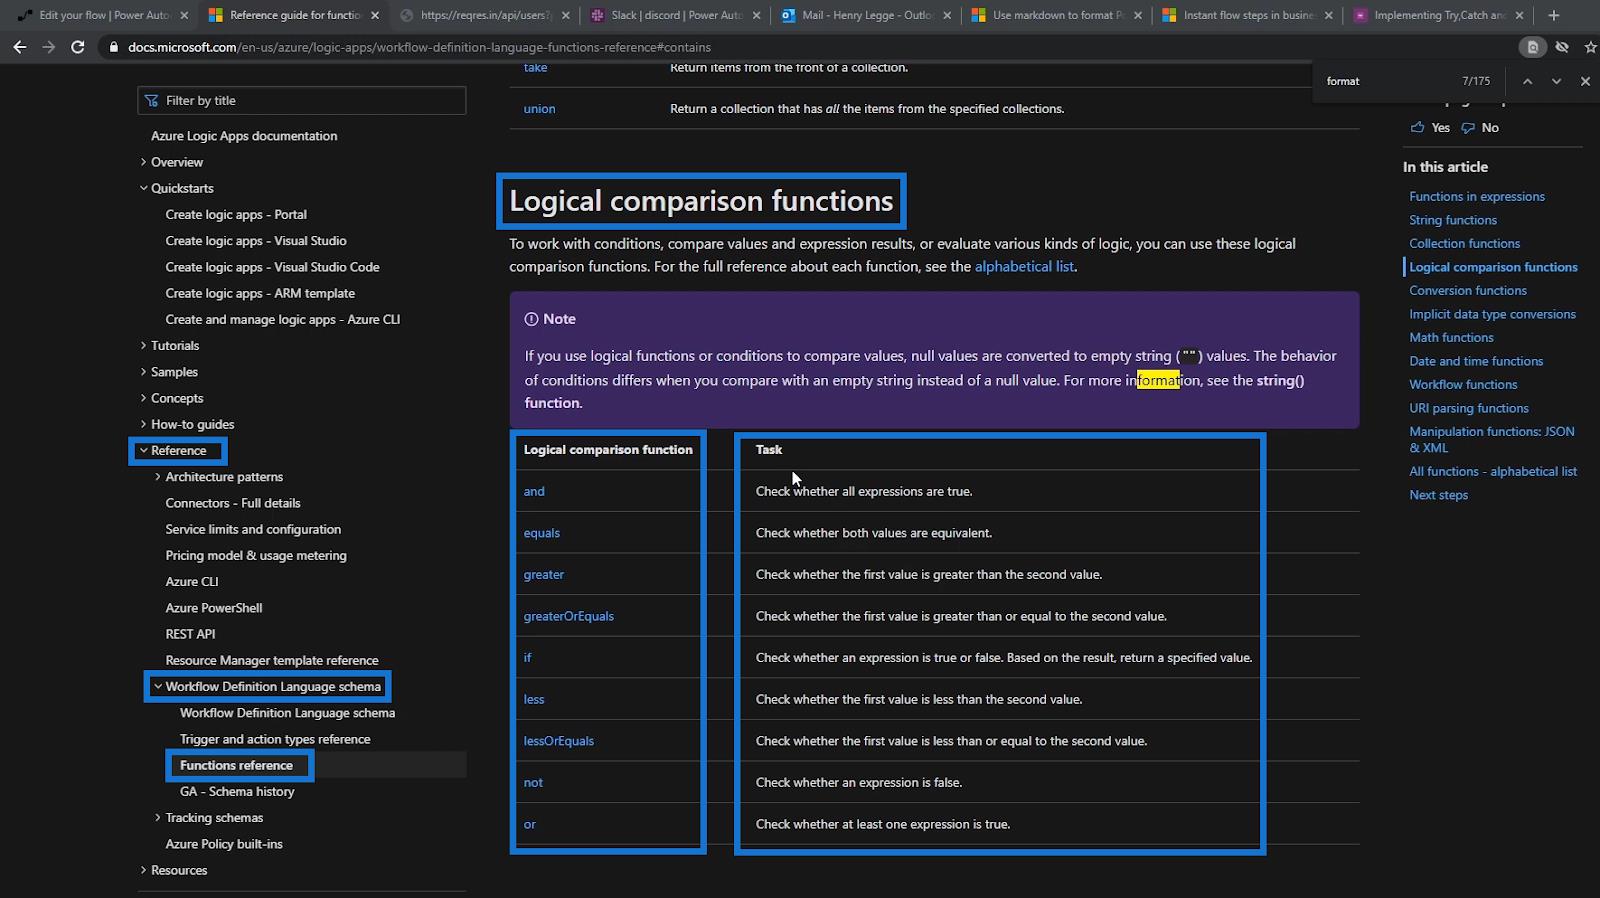
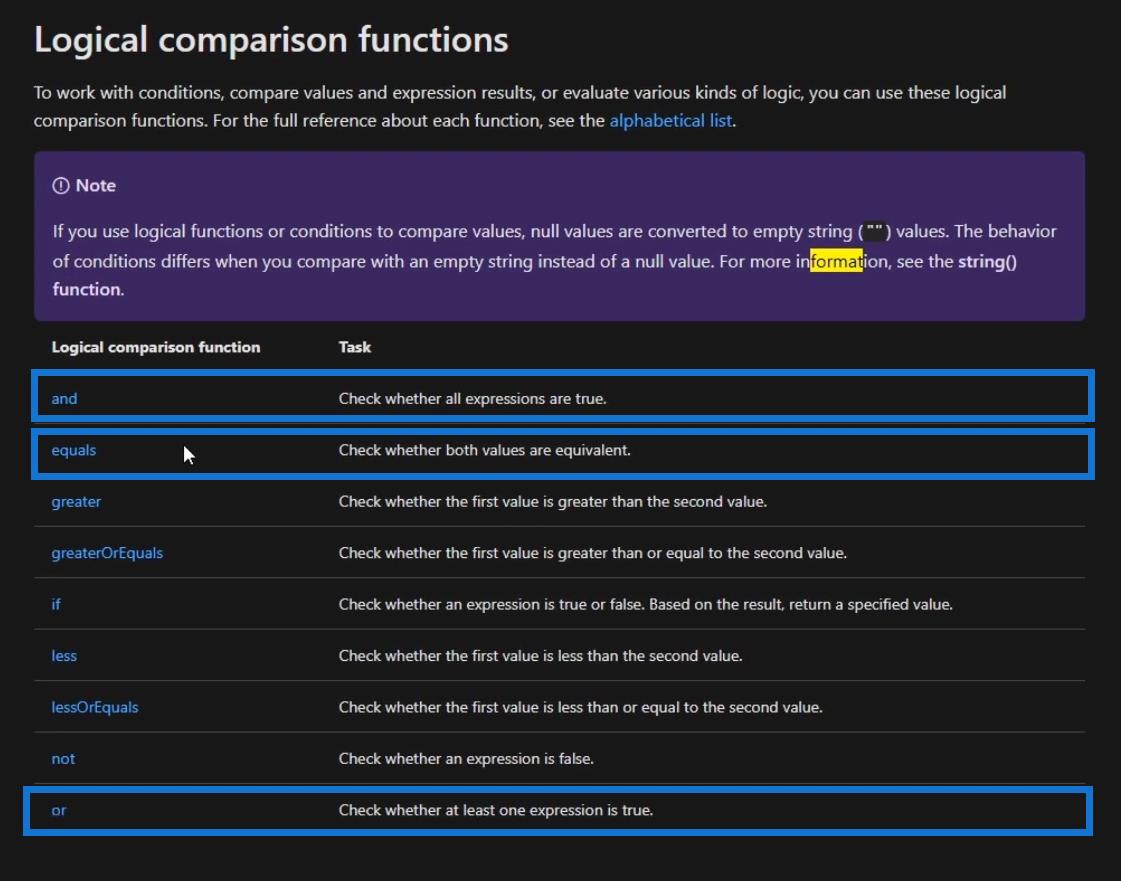
最初に論理関数のドキュメントを参照することで、論理関数の使用法にさらに慣れることもできます。確認するには、Power Automate のドキュメントに移動してください。「参照」オプションをクリックします。次に、「ワークフロー定義言語スキーマ」トピックをクリックします。最後に、「関数リファレンス」サブトピックを選択します。次に、利用可能なすべての論理比較関数と、それに対応する各タスクが表示されます。
目次
Power Automate の IF 関数について理解する
まず、 if関数について説明します。これは、MS Excel またはコーディングのif関数に似ているため、Power Automate 論理関数の中で最も一般的です。MS ワークフローでは、この関数は式がtrueかfalse かをチェックし、その結果に基づいて指定された値を返します。
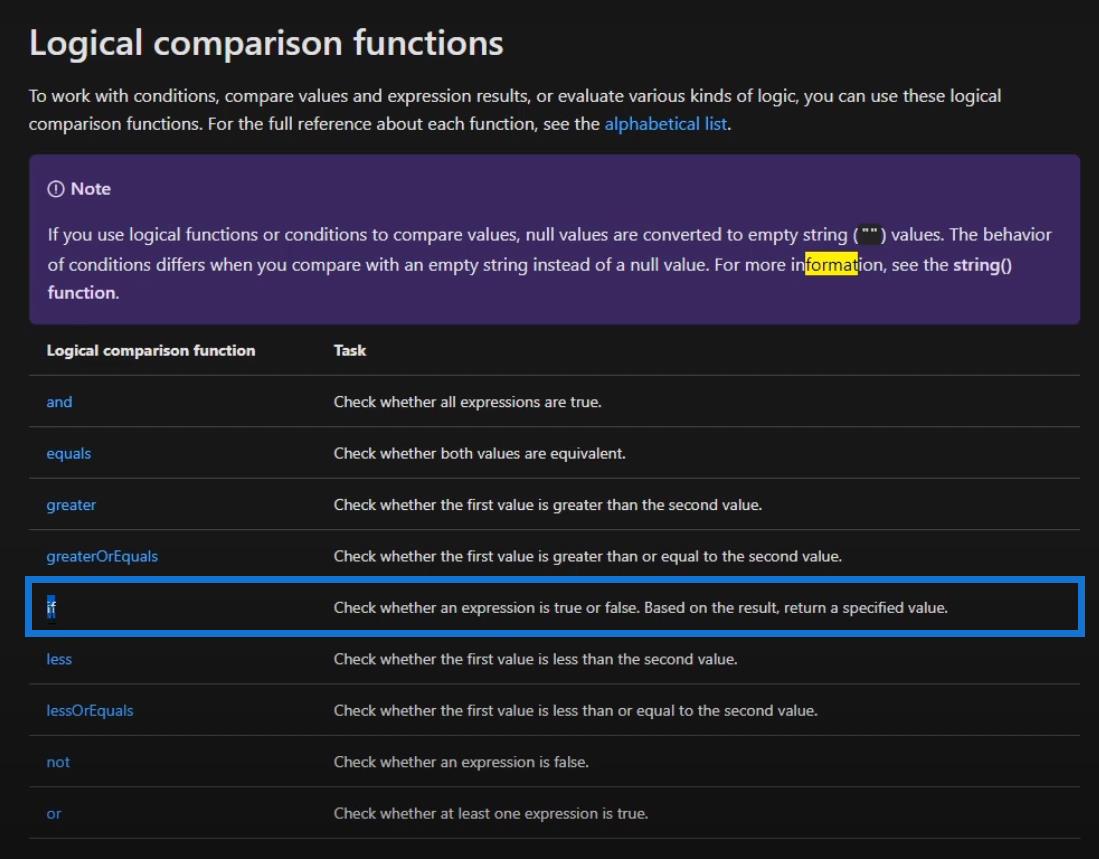
ドキュメント内でそれをクリックすると、関数に関するパラメーターやその他の使用法関連の情報が表示されます。
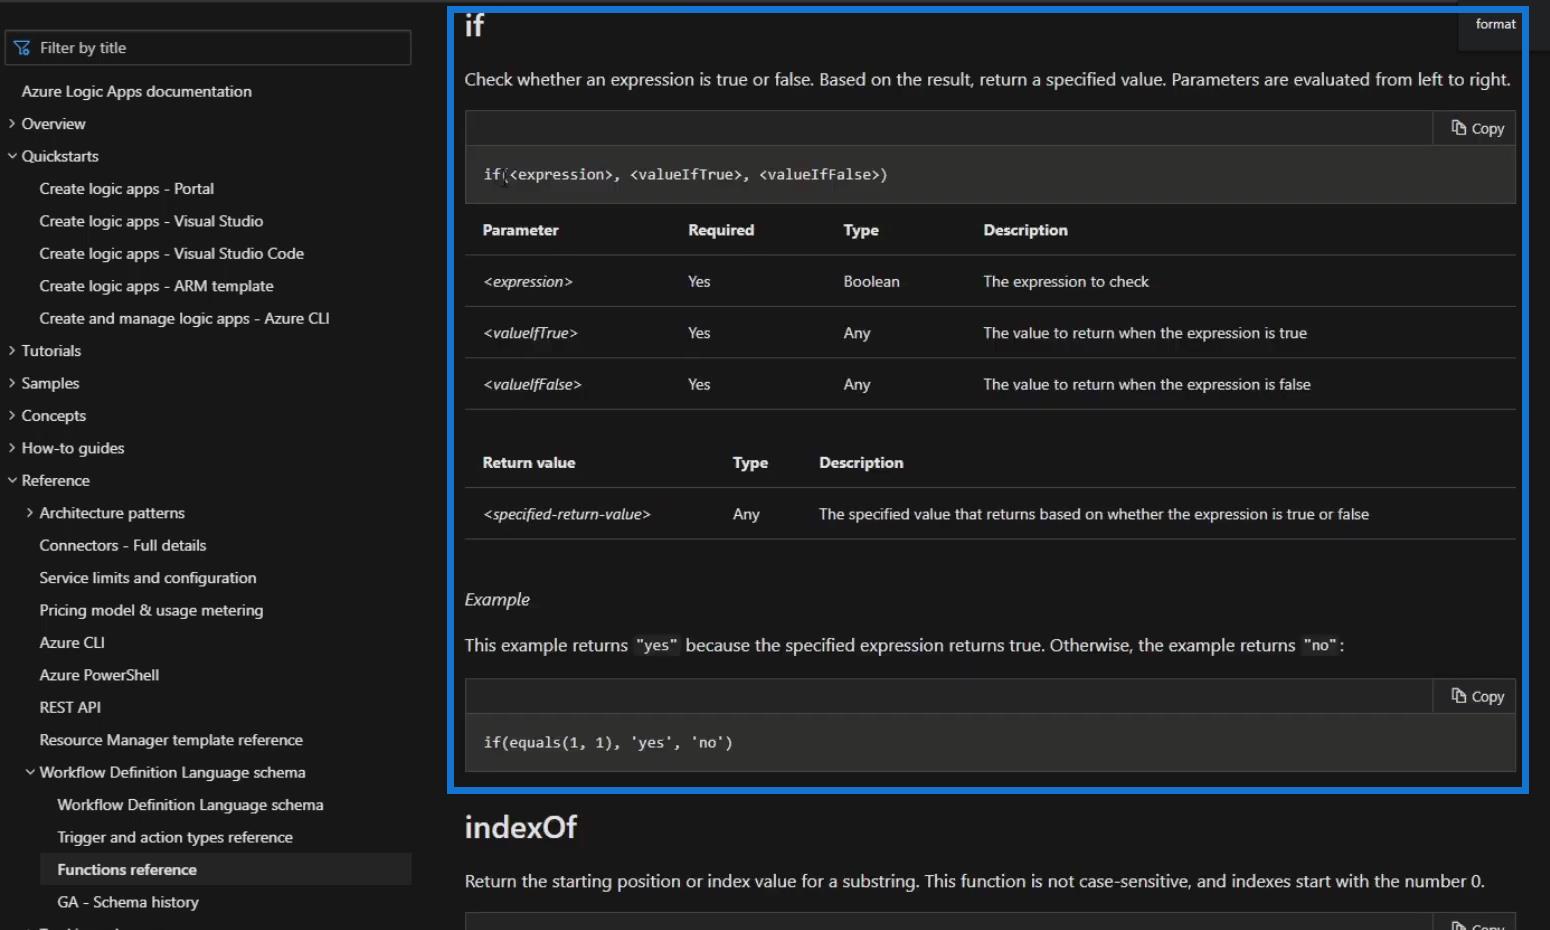
Ifステートメントの最初の引数は式です。2 つ目は、式が true の場合と false の場合に関数が返す内容を指定します。

ワークフローでの If 関数の使用
このフローでは、以前に作成した手動でトリガーされるサンプル フローを使用します。
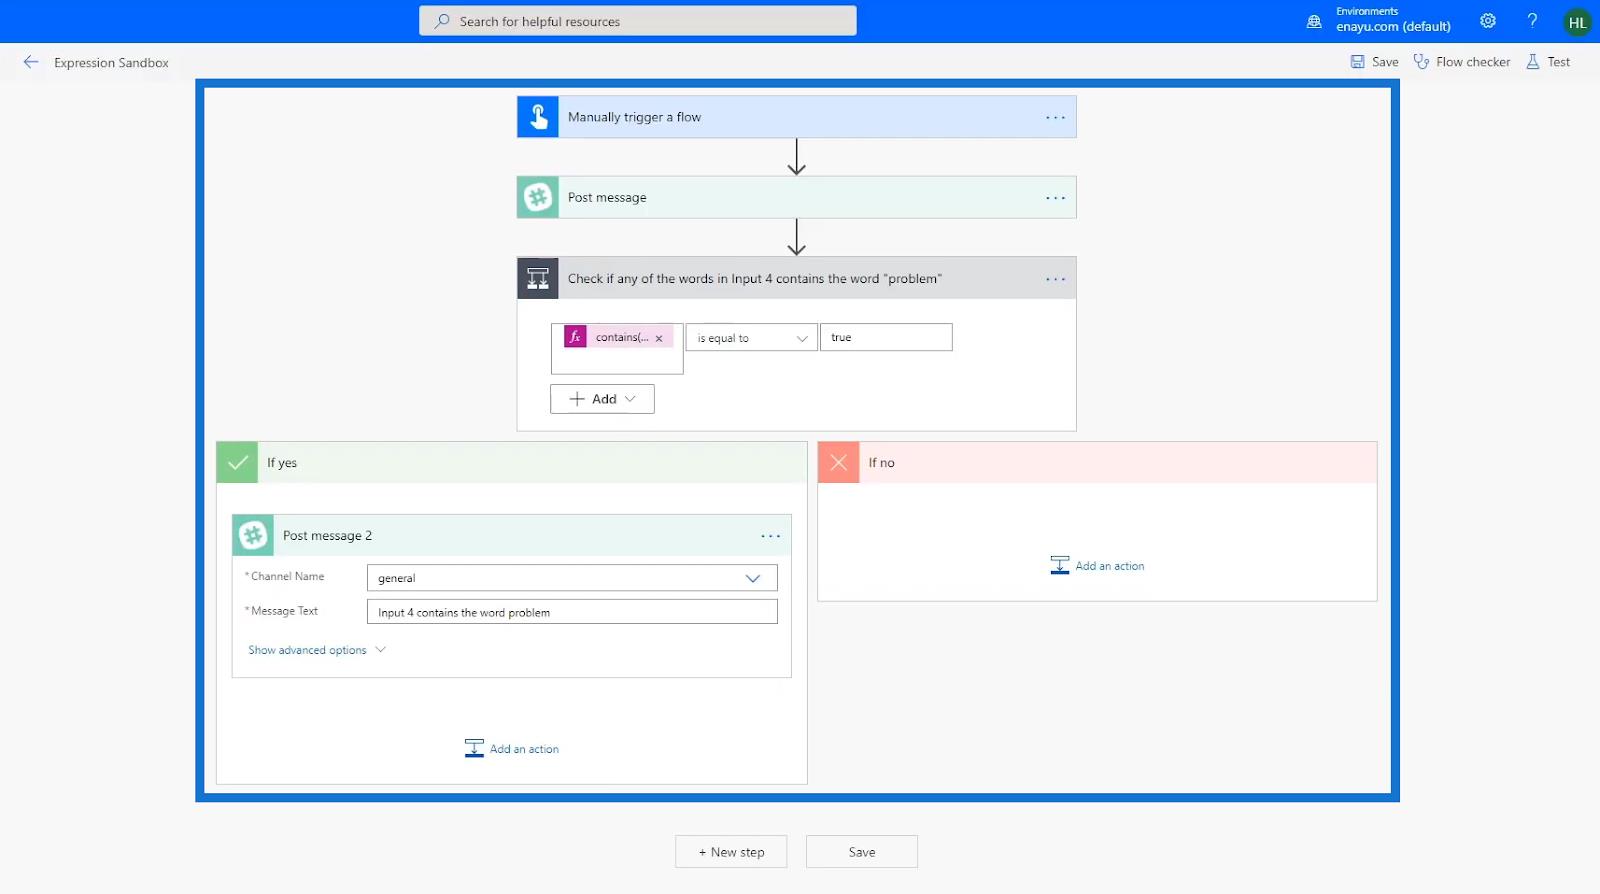
このフローの条件は、入力 4 の単語に「問題」という単語が含まれているかどうかを確認するように設定されています。ユーザーからの入力が条件を満たす場合、式は true になります。したがって、フローは「はいの場合」経路に進みます。それ以外の場合は、 「If no」パスウェイに進みます。
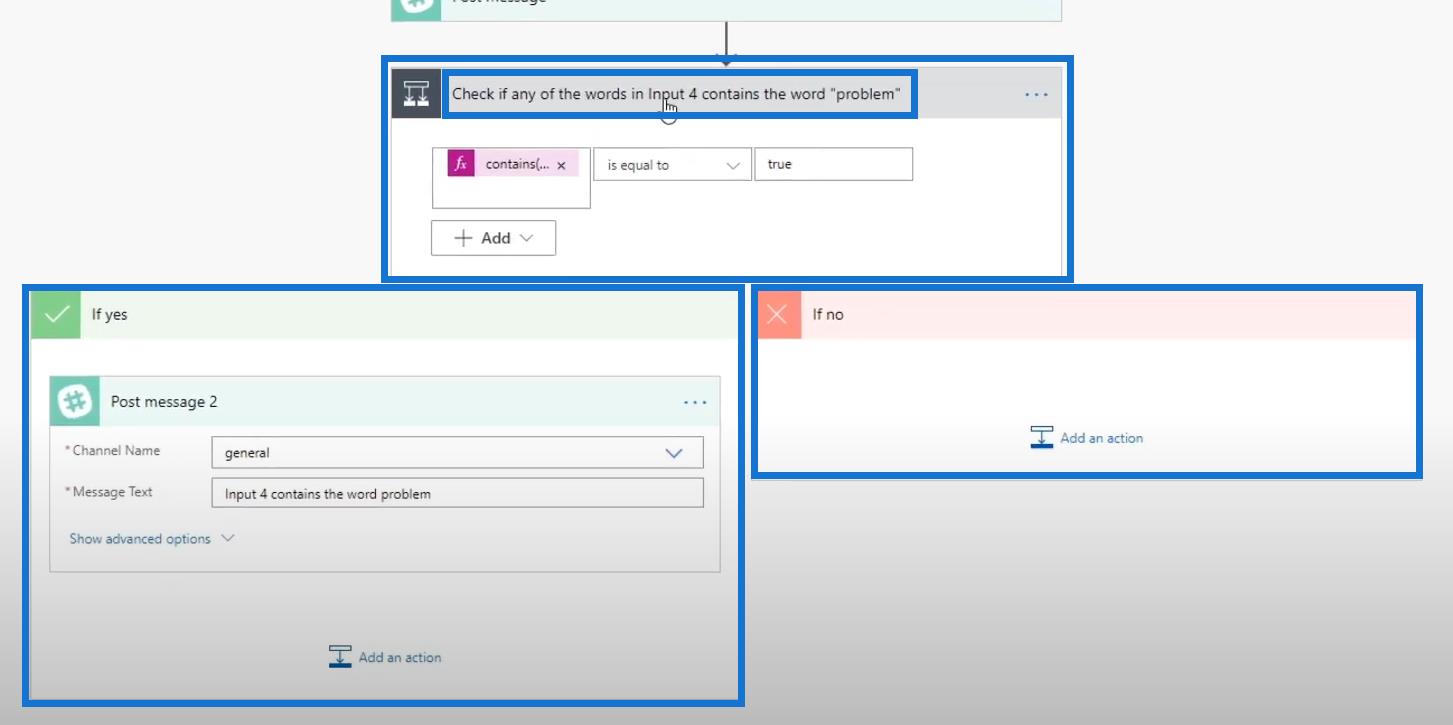
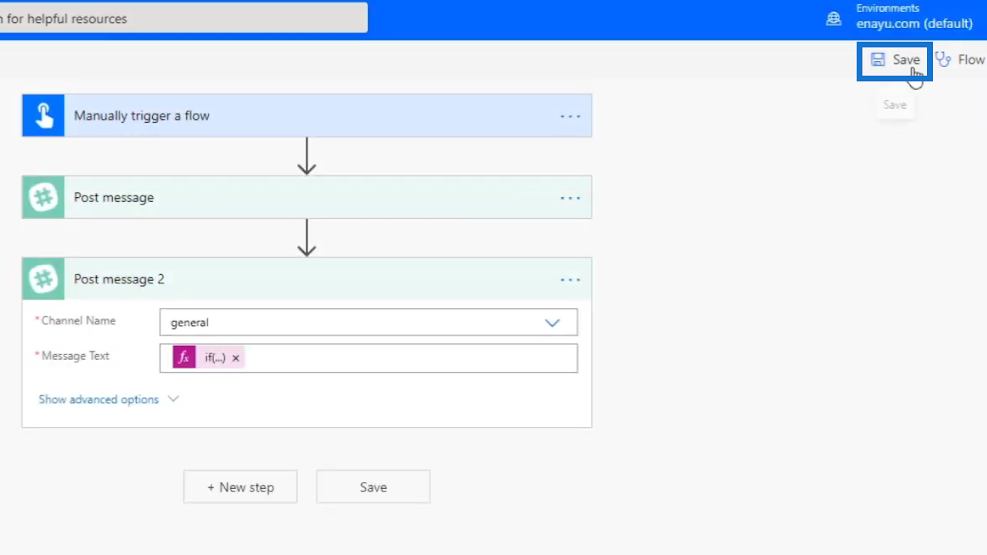
Ifステートメントを使用すると、フロー内のConditionコントロールを置き換えることができます。これを行うには、 「メッセージを投稿 2」アクションをドラッグしましょう。
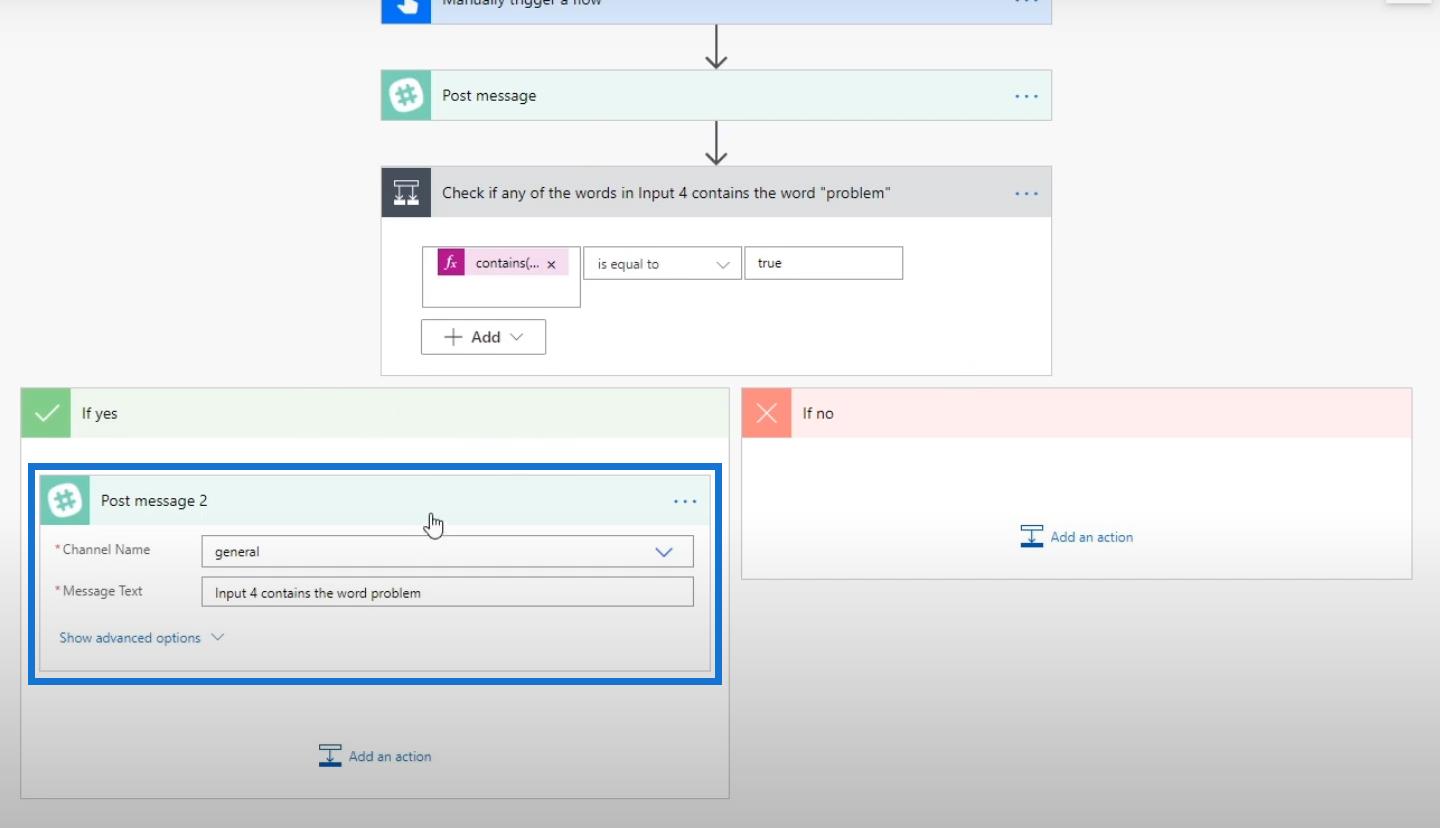
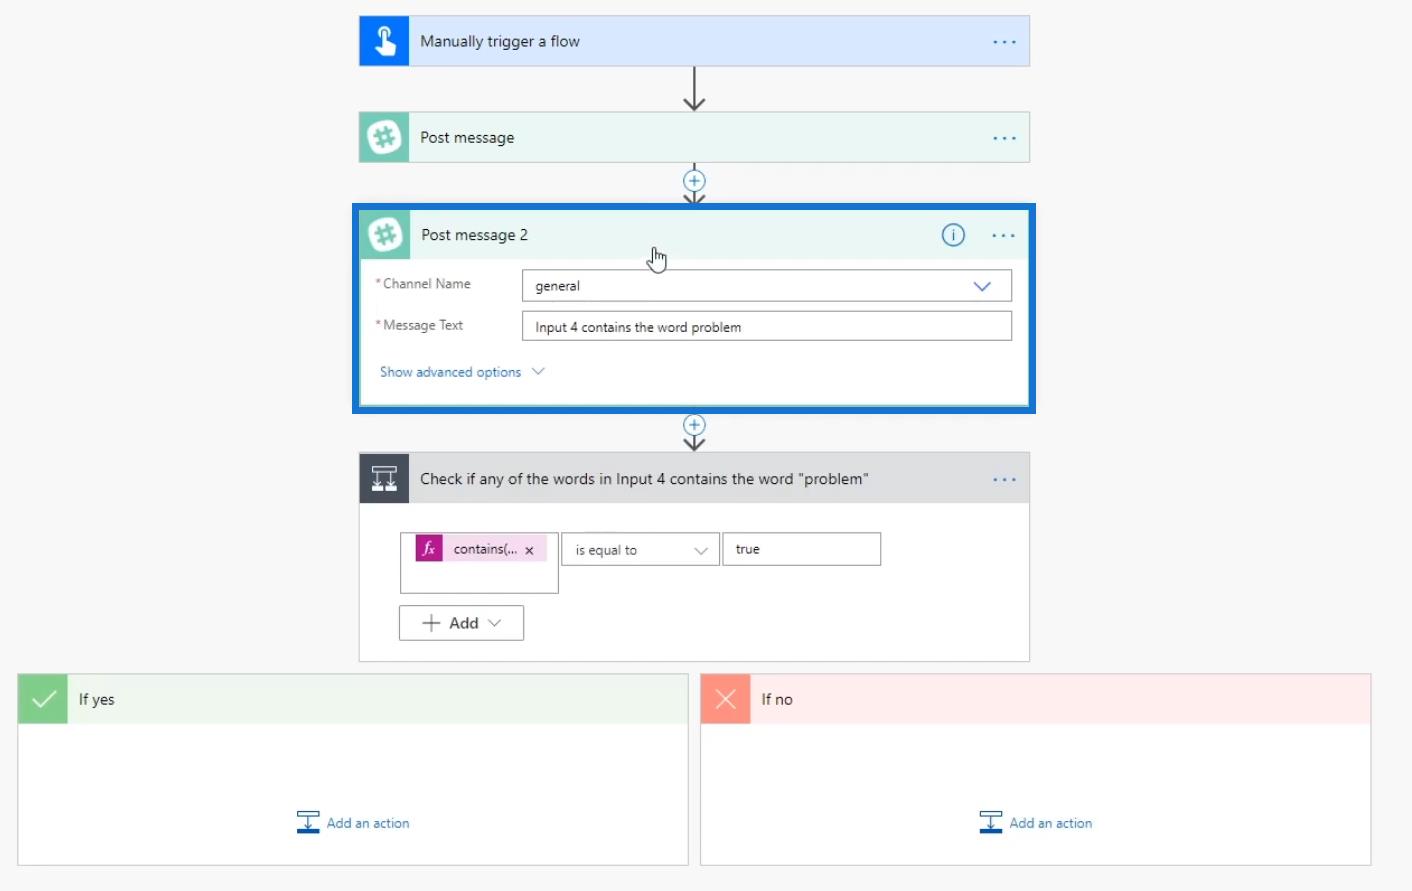
次に、それをメッセージの投稿アクションと条件ブロックの間に配置します。
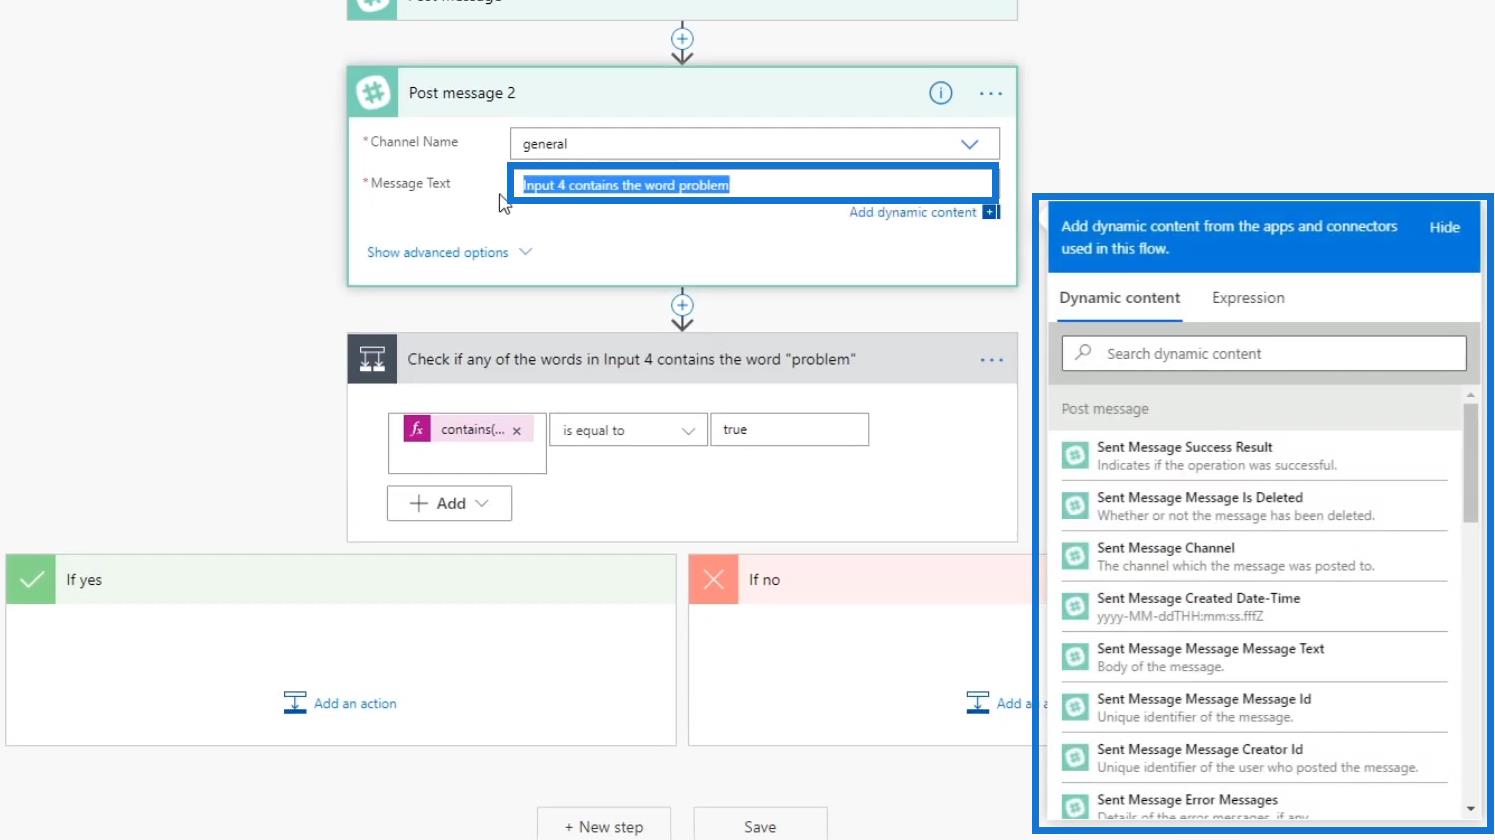
[メッセージ テキスト]フィールドをクリックして、使用可能なオプションを表示します。
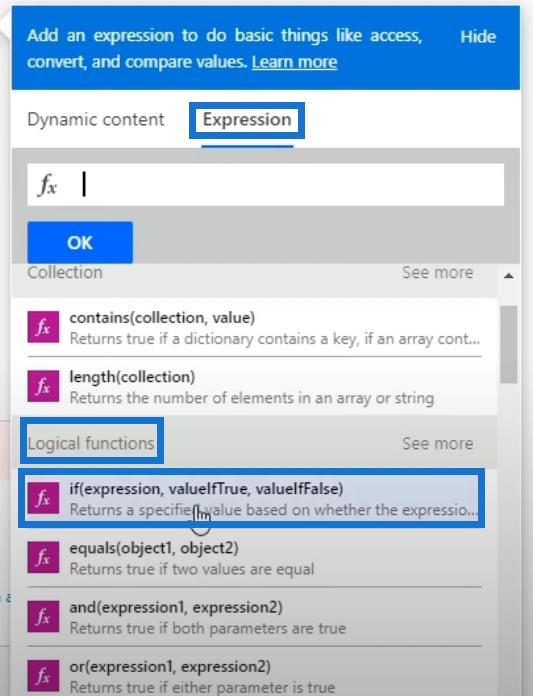
[式]をクリックします。次に、「論理関数」の下にある「 if関数」をクリックします。
繰り返しますが、テストしたいのは、入力 4 に「問題」という単語が含まれているかどうかです。これを行うには、まず[文字列関数]の下にある分割関数をクリックして、入力 4を配列に分割します。
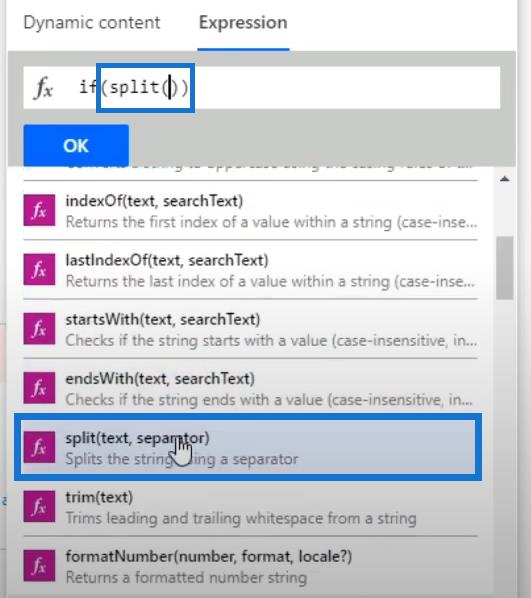
[動的コンテンツ]をクリックし、[入力 4]をクリックします。次に、その内容がステートメントに追加されることを確認します。
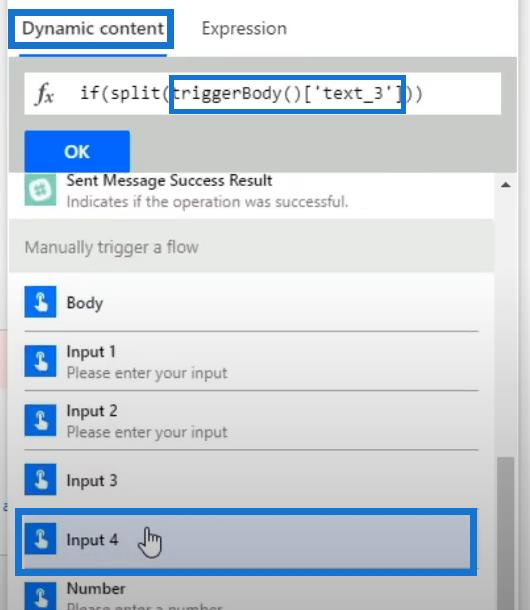
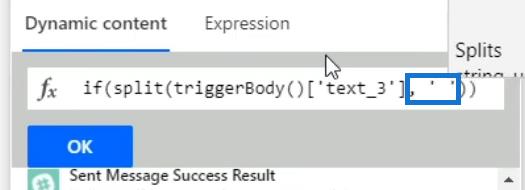
コンマ( , ) と、一対の一重引用符( '' ) の間にスペースを追加しましょう。スペースは、配列項目のコンテンツの区切り文字として機能します。
次に、ステートメントを式に変更します。そのためには、単語splitの前にカーソルを置きましょう。次に、「式」タブの下にある「contains」関数をクリックします。
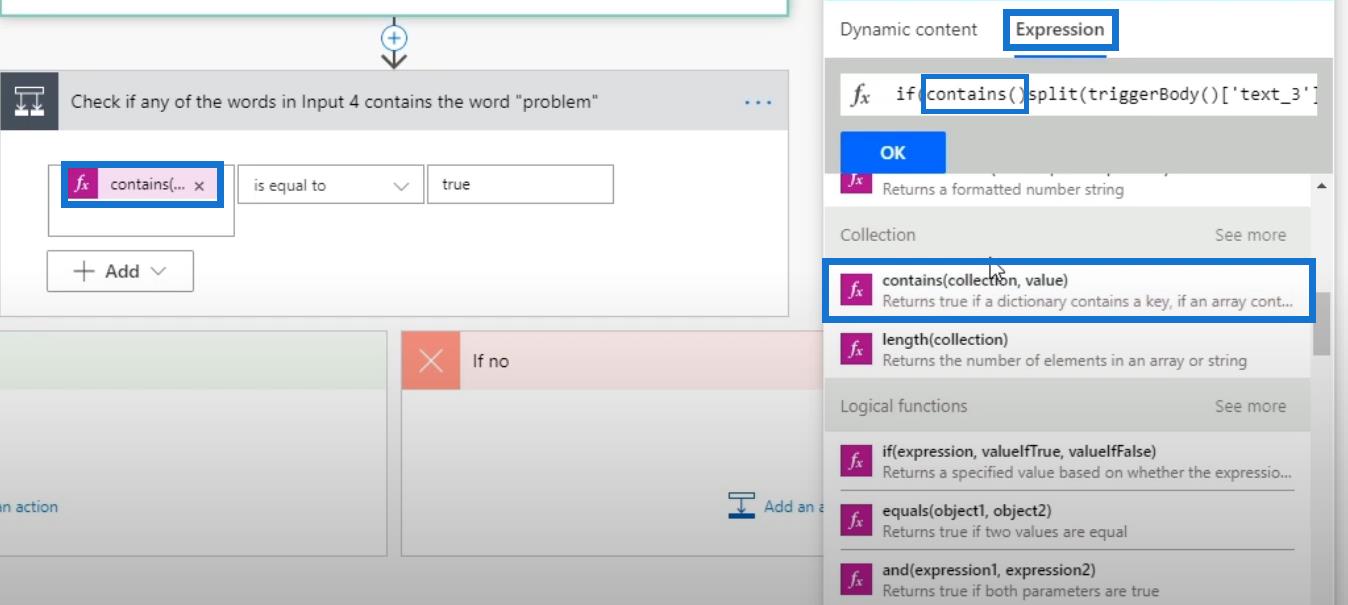
単語を分割する前に余分な右括弧を削除します。

カンマ( , ) とスペースを追加し、一重引用符( ' )で囲んで「問題」という単語を入力しましょう。次に、右括弧( ) )、別のカンマ( , )、その後にスペースを追加します。

したがって、「問題」という単語を含む要素がある場合は、 trueを返します。そうでない場合は、 falseを返します。trueを返した場合、メッセージを「入力 4 には単語の問題が含まれています」とします。これを行うには、ステートメントの最後に「入力 4 には単語の問題が含まれています」というテキストを入力しましょう。

falseを返す場合は、メッセージをピリオド( . )だけにしておきます。これを行うには、「問題」という単語の閉じ引用符の直後にコンマ( , )を追加しましょう。スペースを追加し、一重引用符( ' )で囲んでピリオド( . ) を入力します。

その後、「OK」をクリックします。
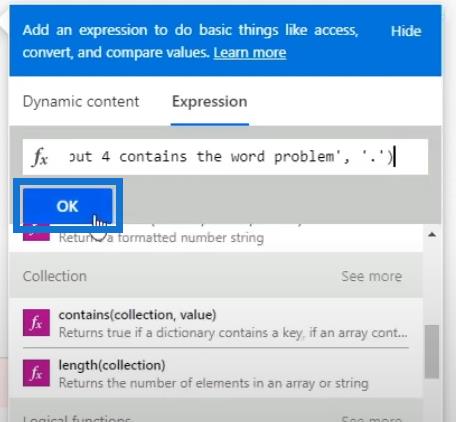
これで、 「メッセージ テキスト」フィールドの初期値を削除できるようになりました。
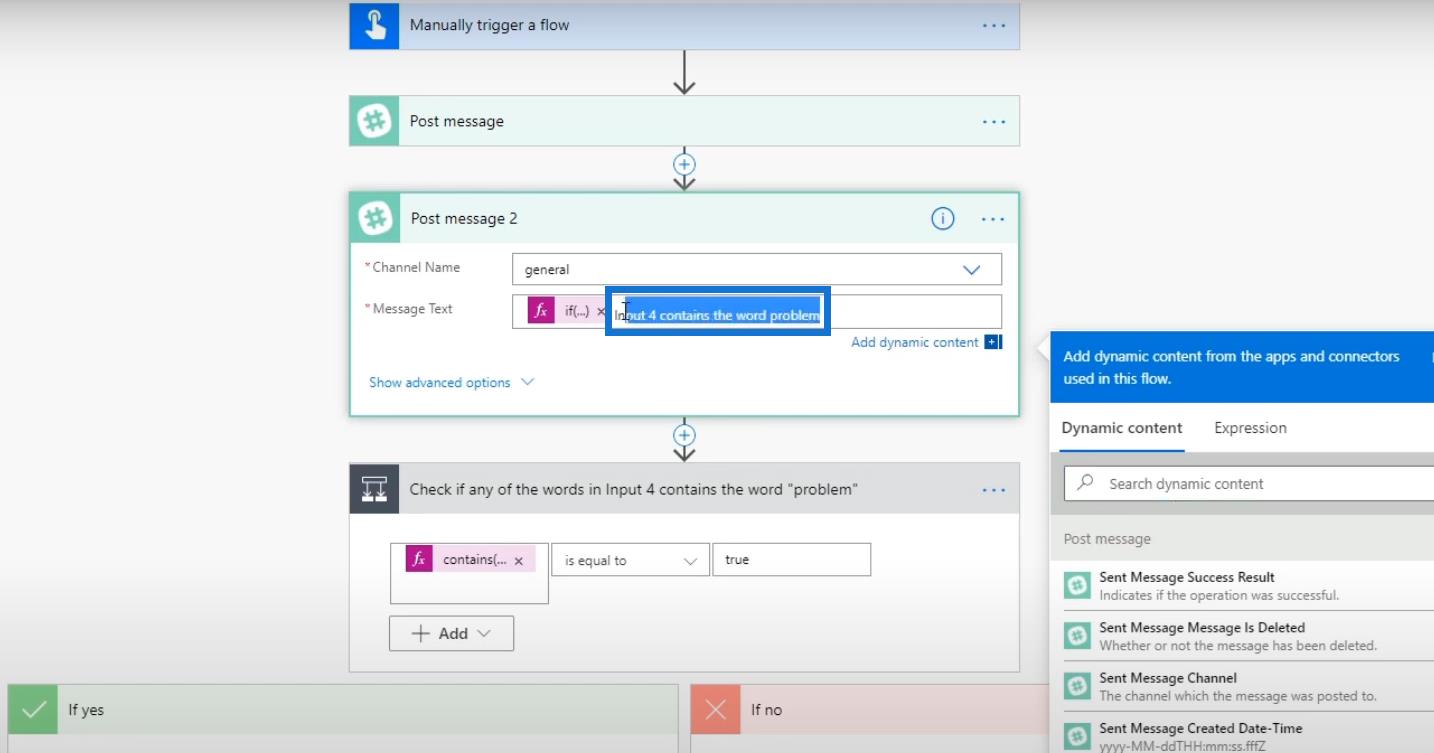
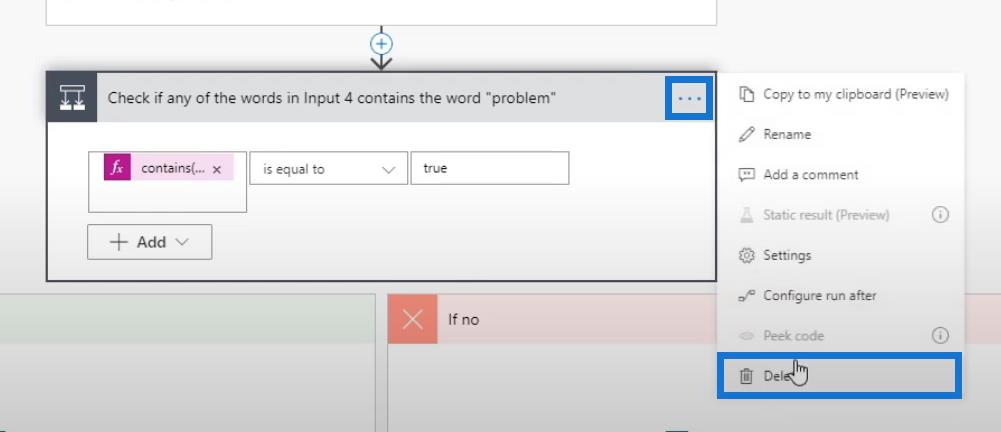
Conditionブロックも削除しましょう。
次に、「OK」をクリックします。
最後に、「保存」をクリックします。
フローのテスト
次に、フローをテストして、どのように機能するかを見てみましょう。
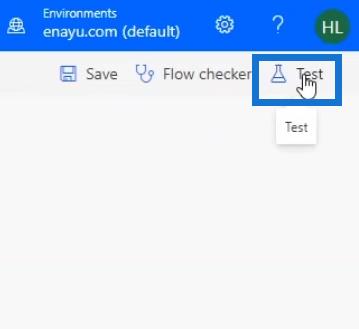
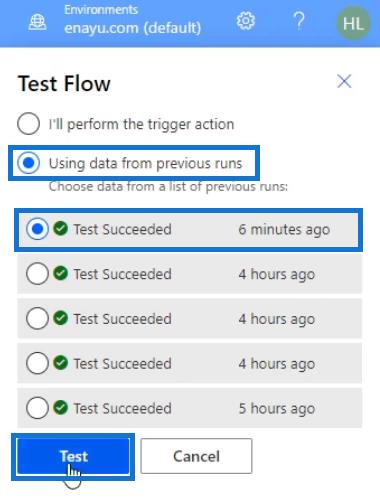
前回の実行時と同じデータを使用してこれを実行してみましょう。次に、「テスト」をクリックします。
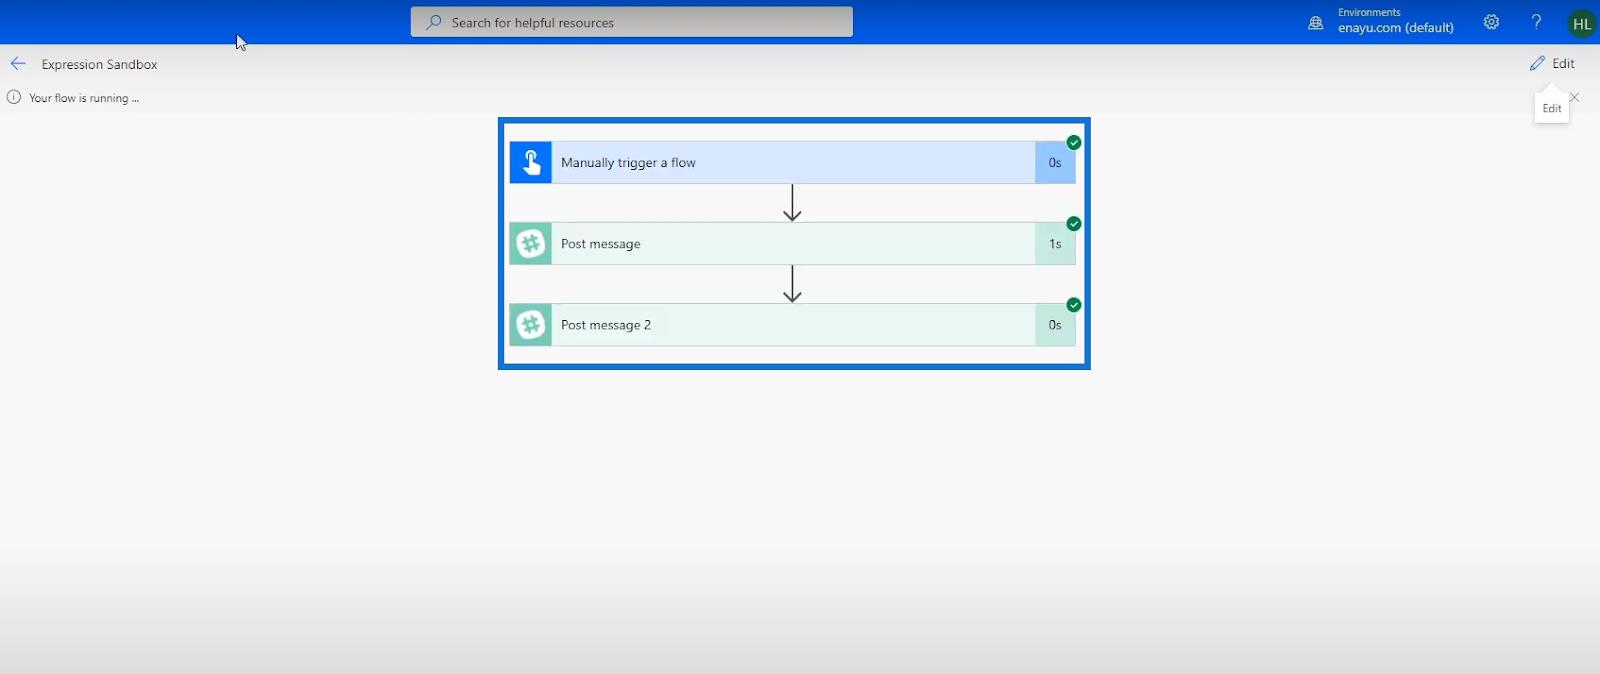
その後、フローの実行が成功した結果が表示されます。
Slack の一般チャンネルを確認すると、「入力 4 に単語の問題が含まれています」というメッセージが正常に表示されていることがわかります。
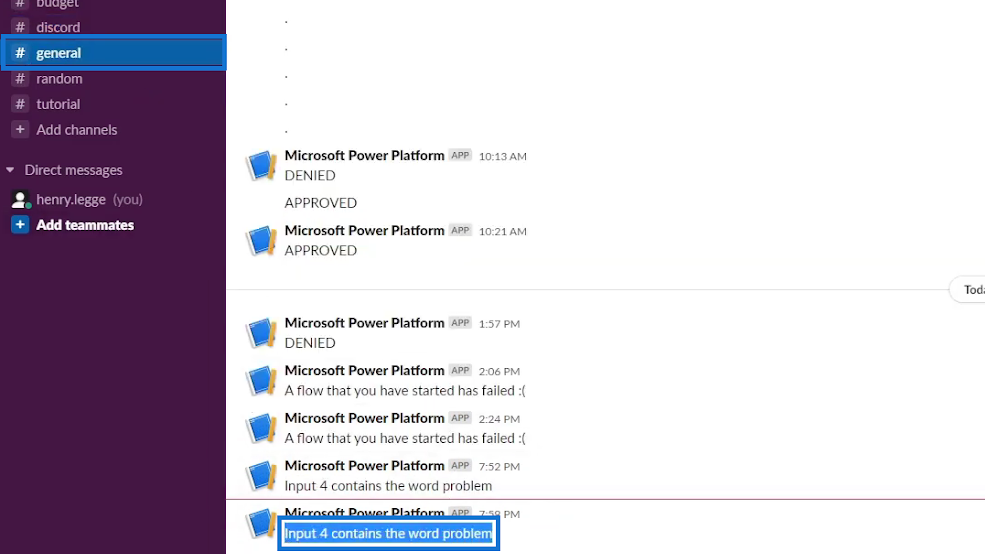
したがって、ConditionコントロールをIfステートメントに置き換えることに成功しました。どちらもまったく同じように機能します。
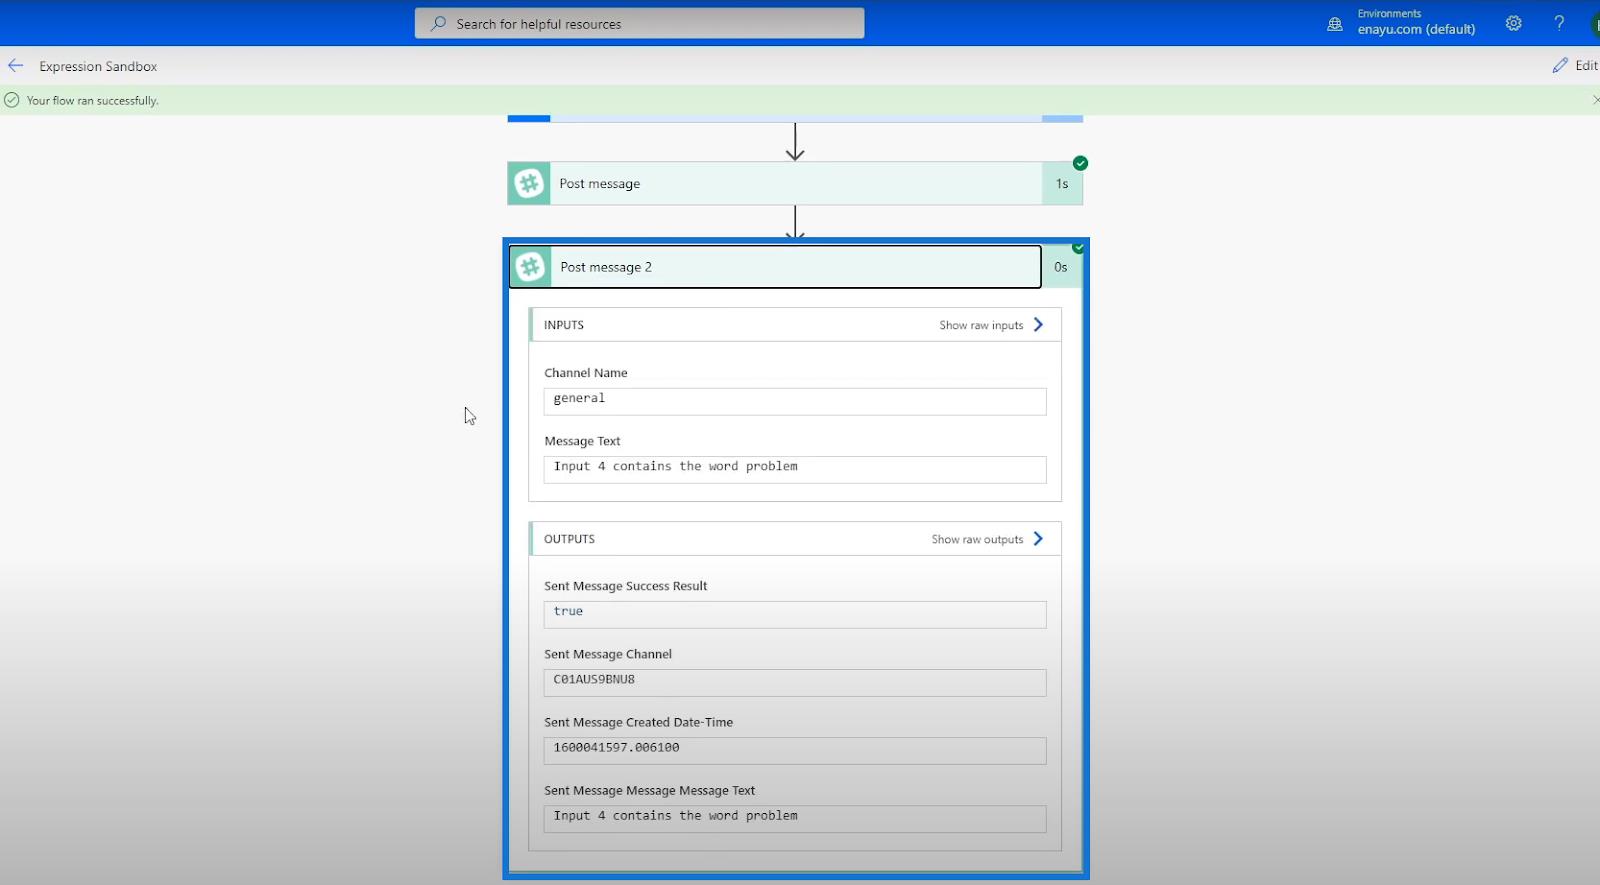
その他の Power Automate 論理関数
他にもよく使用される論理比較関数が3 つあります。and関数、equals 関数、およびor関数です。
1. Power Automate 論理関数: 等しい
等しい関数を確認してみましょう。

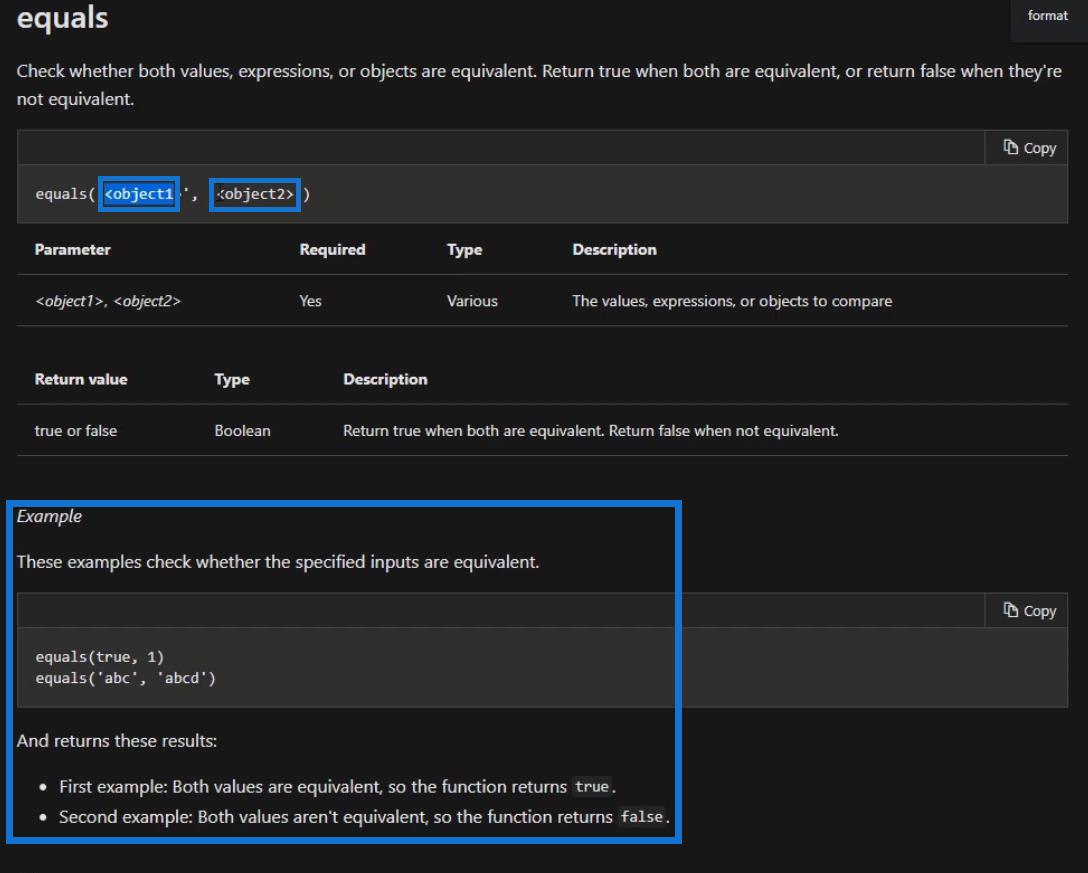
この関数は非常に単純で、以前のチュートリアルですでに使用しています。これは、 string、integer、collections、arrayなどの 2 つのオブジェクトを評価します。2 つのオブジェクトの値が等しい場合、trueを返します。そうでない場合はfalseを返します。ドキュメントにも例が記載されています。
2. Power Automate 論理関数: そして
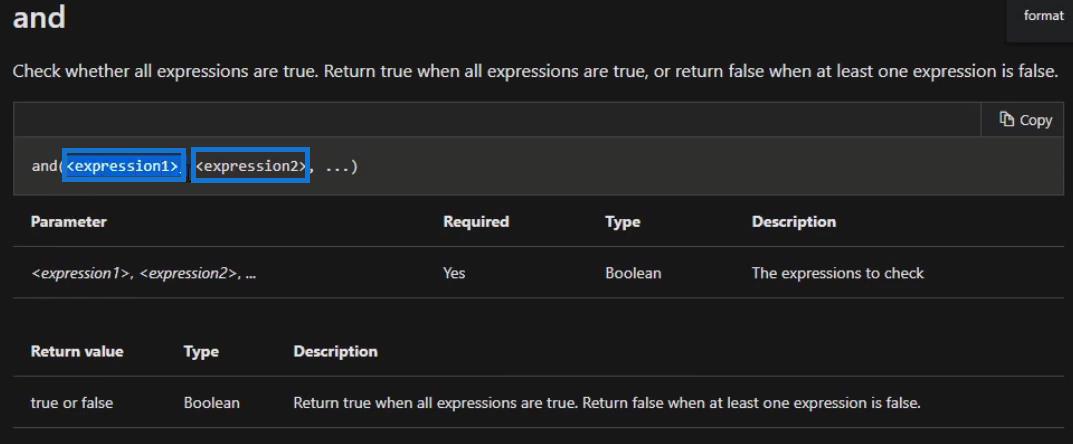
次にand関数です。

この関数は、評価する式が複数ある場合に簡単に使用できます。複数の式を入力すると、すべての式がtrueの場合にtrueが返されます。
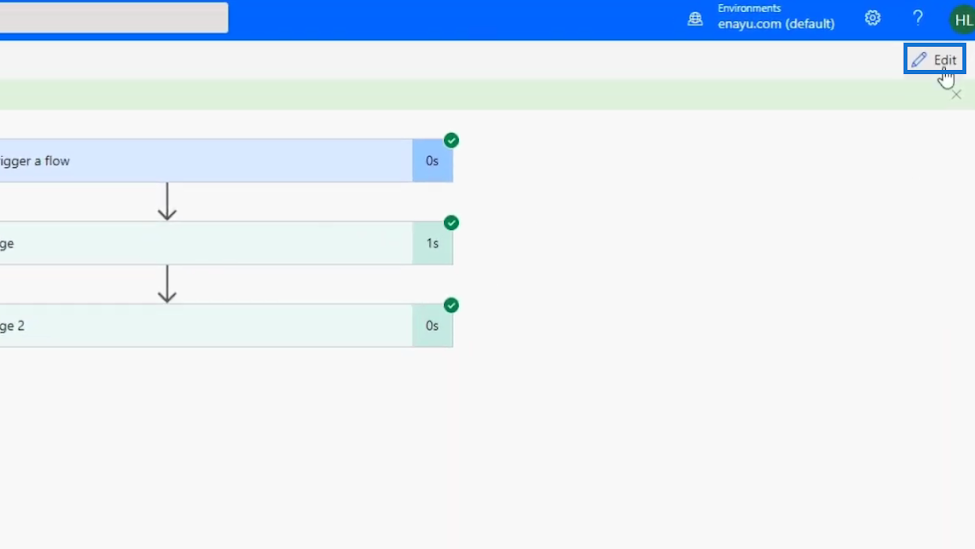
たとえば、フローを編集してみましょう。
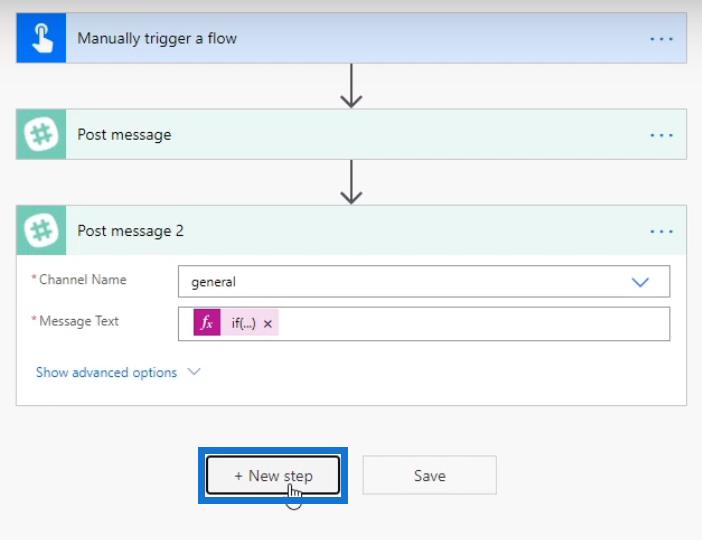
[新しいステップ]をクリックします。
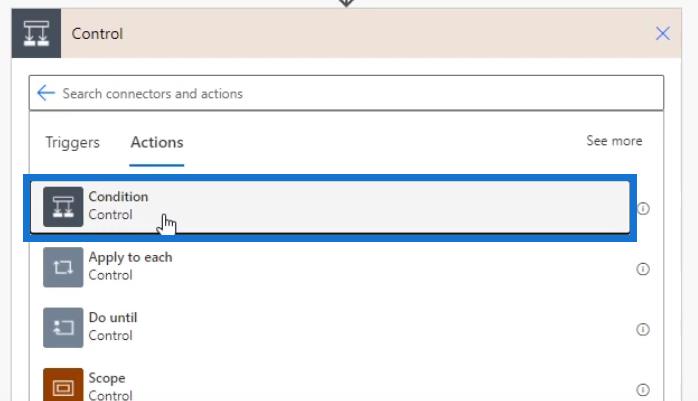
コントロールコネクタをクリックしてみましょう。
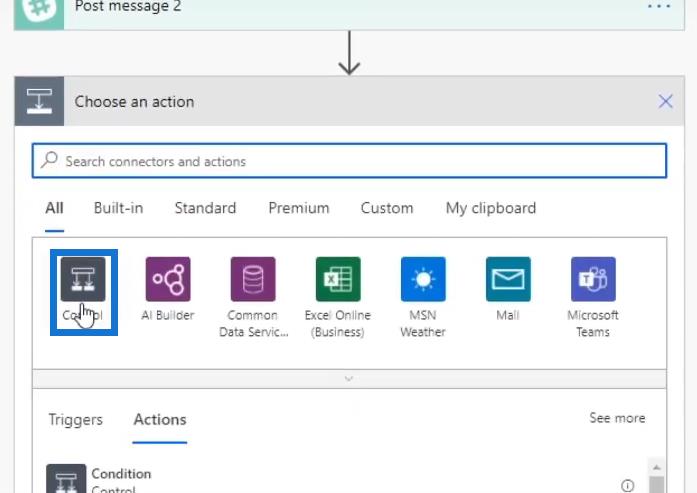
次に、「条件」をクリックします。
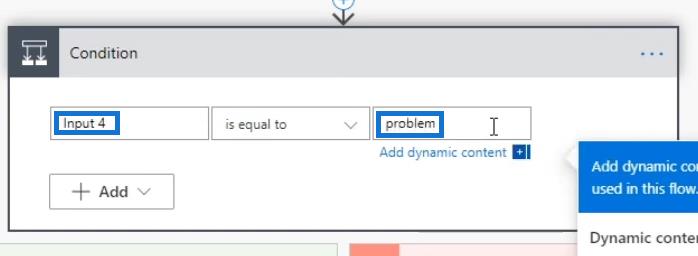
条件を「入力 4 が問題と等しい」に設定します。
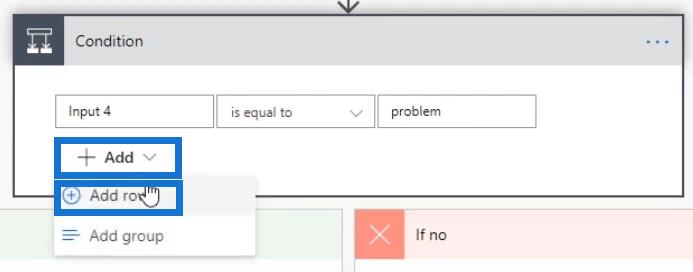
その後、「追加」をクリックし、 「行の追加」をクリックします。
追加の行では、条件を「入力 4 が発行と等しい」に設定します。
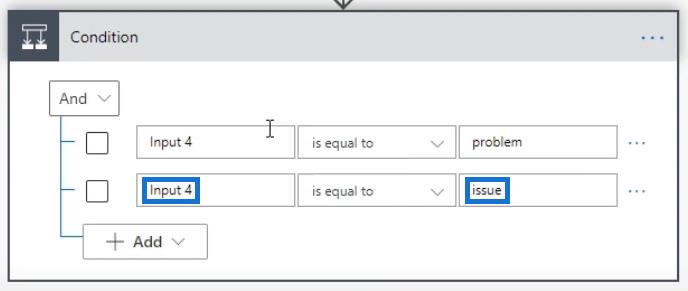
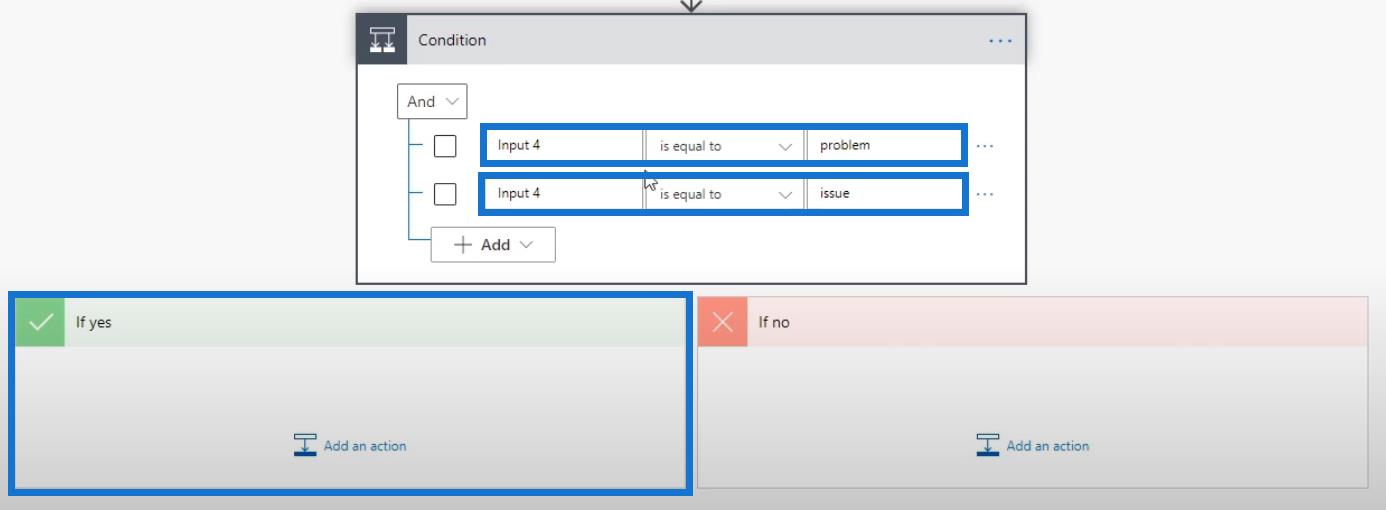
Whatever we input here won’t work because we need to use the Input 4 variable (a dynamic content) instead of just typing Input 4 as strings. But this is only to show you how it looks, which is similar to using the and function in an expression.
In this example, the flow is going to check if the Input 4 is equal to “problem” and if it’s also equal to “issue”. Hence, if both expressions return true, it’ll go down the If yes pathway.
3. Power Automate Logical Functions: Or
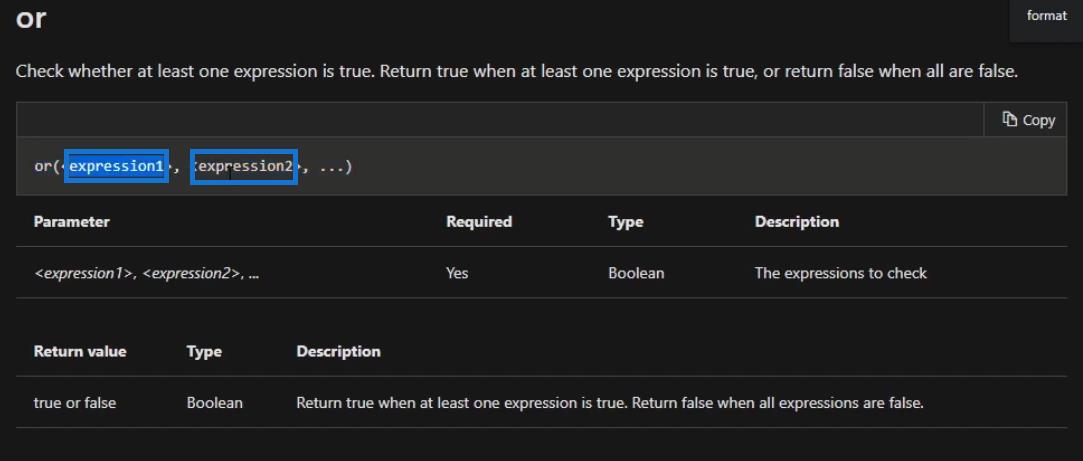
The last one we’ll look at is the or function.

The or function is very similar to the and function. The big difference is that for this function to return true, only one of the expressions needs to be true.
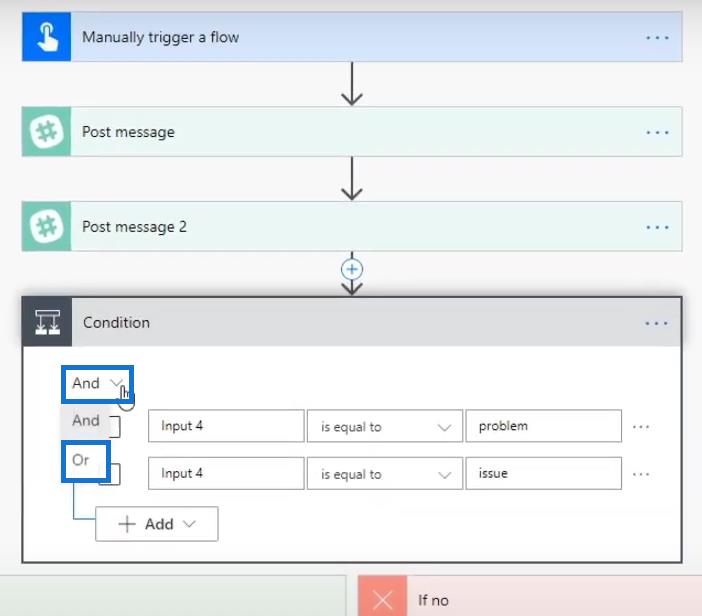
For example, let’s go back to our flow. Then, click the And button and choose the Or option.
I’ve already used this in one of my previous flows. Let’s check that out by clicking the back arrow at the top.
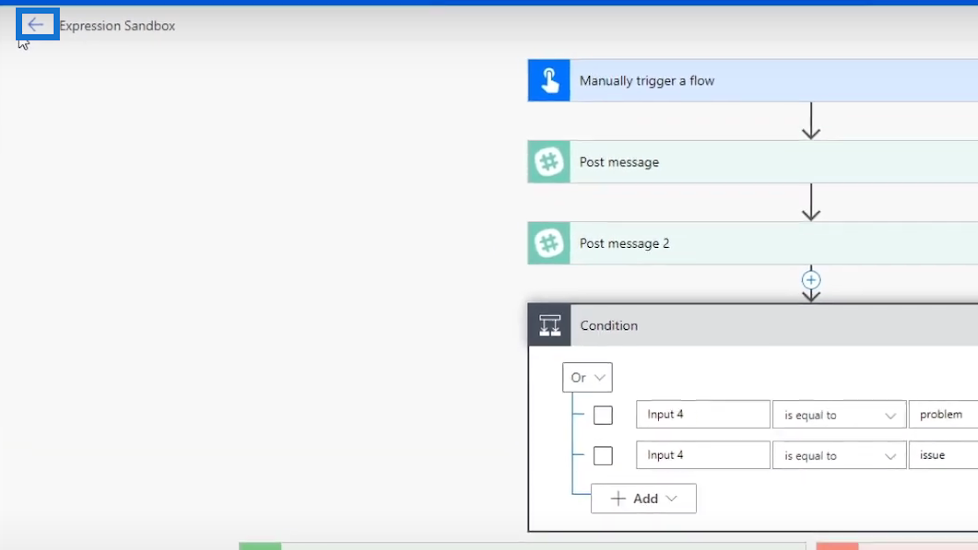
Then click OK.

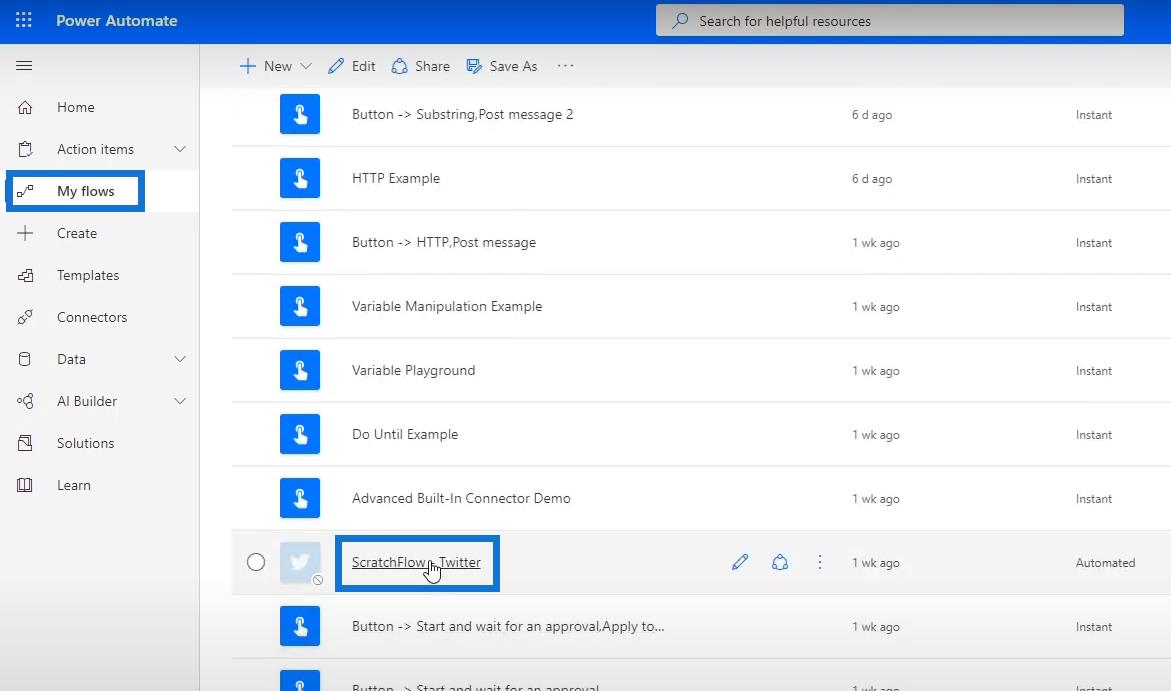
After that, click My flows and click ScratchFlow – Twitter from the list.
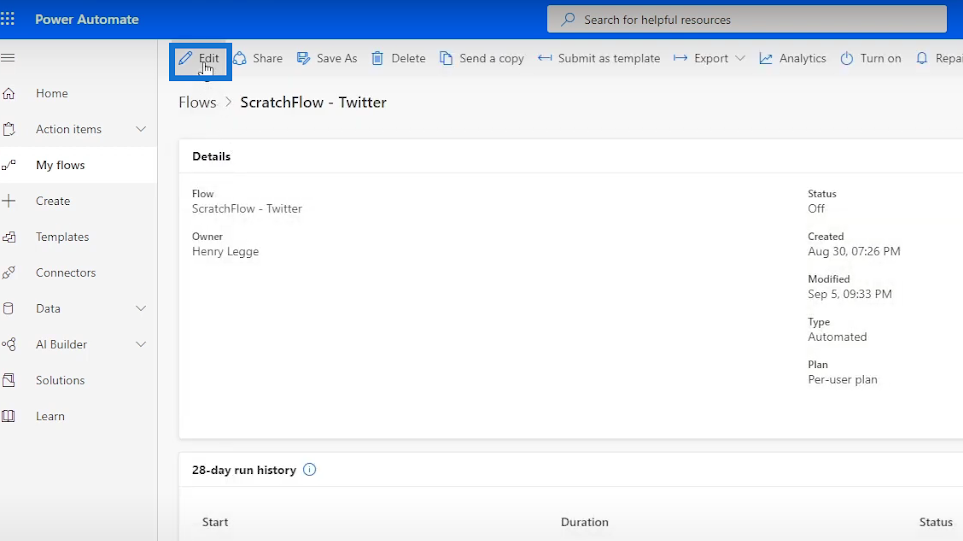
Click Edit.
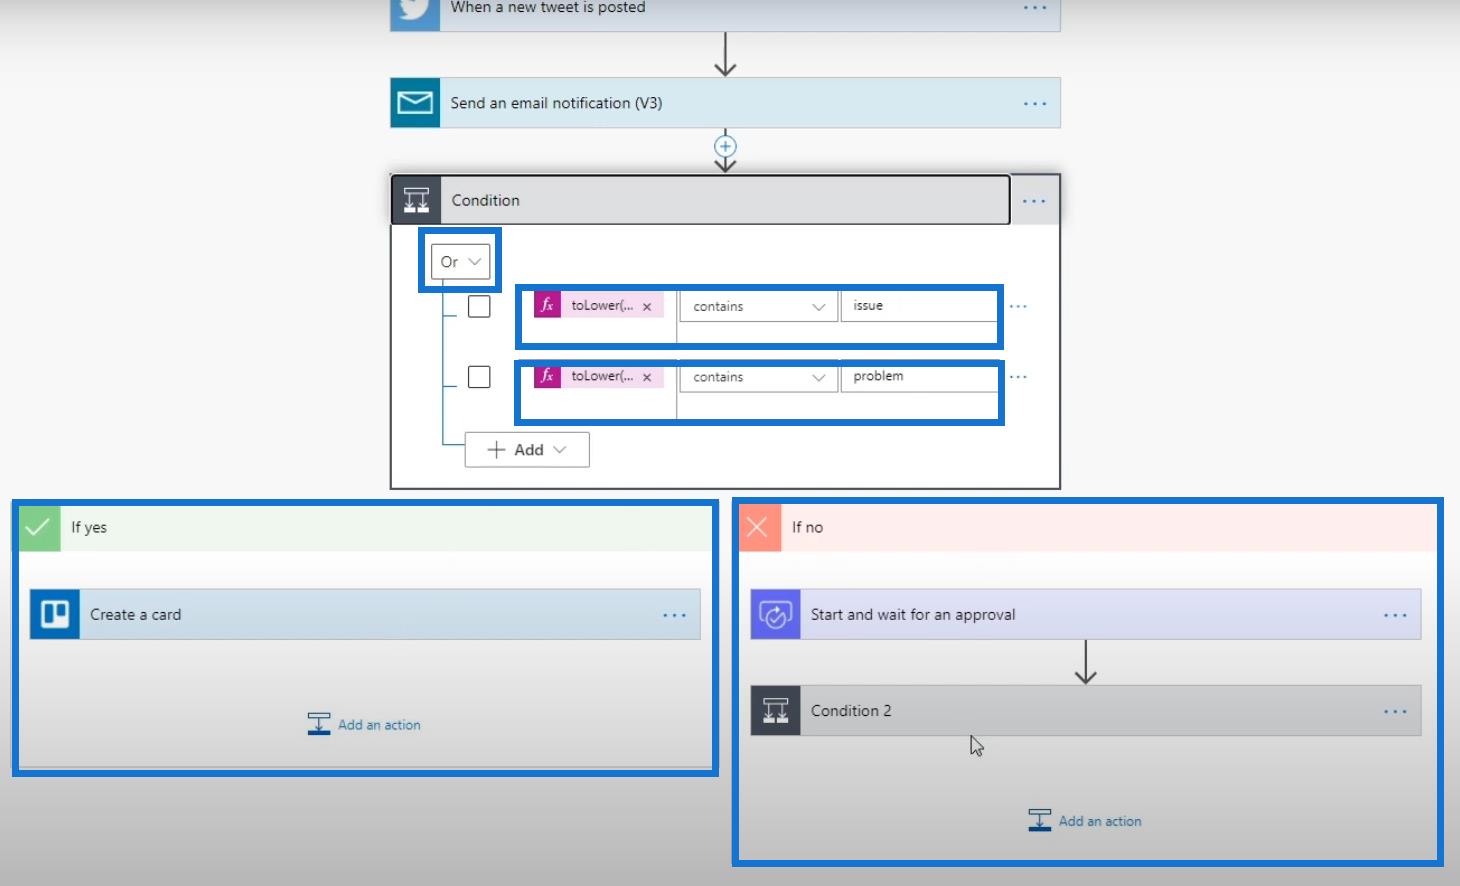
Click the Condition block.

Then, we’ll see that the or function was used in this previous flow. In this example, it evaluates if the tweet contains the word “issue”, or “problem”. If one of these two conditions is true, it’ll perform the action within the If yes pathway which creates a Trello card. If both are false, it’ll do the action that we set for the If no pathway.
Collection Functions In Microsoft Power Automate
Microsoft Flow String Functions: Concat And Replace
Power Automate Split Function And Arrays
Conclusion
Logical comparison functions are very similar to the Condition connector in Microsoft Power Automate. However, I still recommend using the Condition connector over Logical comparison functions because it’s much easier to use in flow diagrams.
If you’d like to use the logical functions, that’s totally fine especially if you have a coding background. In addition, most Logical comparison functions can be replicated using Condition control connectors instead of using codes.
ただし、もちろん、フローをどのように構成して実行するかは完全にユーザー次第です。認定されたPower Automate 管理者になることが目標である場合は、これらの機能についても理解しておく必要があることに注意してください。
ではごきげんよう、
ヘンリー
Microsoft フローで使用できる 2 つの複雑な Power Automate String 関数、substring 関数とindexOf 関数を簡単に学習します。
LuckyTemplates ツールチップを使用すると、より多くの情報を 1 つのレポート ページに圧縮できます。効果的な視覚化の手法を学ぶことができます。
Power Automate で HTTP 要求を作成し、データを受信する方法を学んでいます。
LuckyTemplates で簡単に日付テーブルを作成する方法について学びましょう。データの分析と視覚化のための効果的なツールとして活用できます。
SharePoint 列の検証の数式を使用して、ユーザーからの入力を制限および検証する方法を学びます。
SharePoint リストを Excel ファイルおよび CSV ファイルにエクスポートする方法を学び、さまざまな状況に最適なエクスポート方法を決定できるようにします。
ユーザーがコンピューターから離れているときに、オンプレミス データ ゲートウェイを使用して Power Automate がデスクトップ アプリケーションにアクセスできるようにする方法を説明します。
DAX 数式で LASTNONBLANK 関数を使用して、データ分析の深い洞察を得る方法を学びます。
LuckyTemplates で予算分析とレポートを実行しながら、CROSSJOIN 関数を使用して 2 つのデータ テーブルをバインドする方法を学びます。
このチュートリアルでは、LuckyTemplates TREATAS を使用して数式内に仮想リレーションシップを作成する方法を説明します。

