Raggruppa e separa oggetti in Adobe CS5 Illustrator

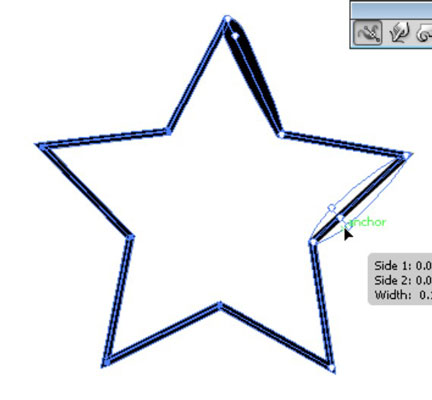
Scopri come raggruppare e separare oggetti in Adobe Creative Suite 5 (Adobe CS5) Illustrator per migliorare il tuo flusso di lavoro creativo.
Dopo aver elaborato le tue foto in Adobe Lightroom Classic (come un professionista!), sei pronto per inviarle nel mondo. Ciò significa che è tempo di esportazione! L'umile finestra di dialogo Esporta ha una grande potenza e, con un po' di pratica, puoi sfruttare tutto ciò che ha da offrire.
Lightroom Classic (come probabilmente avrai capito ormai) è un'applicazione per il flusso di lavoro e all'interno del flusso di lavoro più ampio di portare le tue foto dall'input all'output, esistono molti flussi di lavoro più piccoli all'interno dei flussi di lavoro. L'esportazione non fa eccezione. Ecco i passaggi fondamentali:
Seleziona le immagini che desideri esportare.
Avvia il comando Esporta.
Configura le impostazioni necessarie per soddisfare le tue esigenze di output.
(Facoltativo) Salva le impostazioni come predefinito per il riutilizzo.
Passaggio 1: selezione delle immagini che si desidera esportare
Le foto che selezioni per l'esportazione sono determinate dalle tue esigenze in quel momento. Puoi esportare immagini da qualsiasi modulo Lightroom Classic, ma il modulo Libreria ti offre il massimo accesso all'intero portfolio e l'esportazione da lì di solito ha più senso. Quindi, se non ci sei già, premi G per passare alla vista Griglia della libreria. Da qui, hai accesso a tutte le tue cartelle e raccolte, nonché alla barra Filtro libreria, il che significa che puoi andare avanti e rintracciare le immagini che desideri. (Vai avanti; prenditi il tuo tempo.)
Dopo aver individuato le immagini che desideri esportare, puoi selezionarle con uno dei seguenti metodi:
Passaggio 2: avvio del comando Esporta
Dopo aver selezionato le immagini, è possibile avviare un'esportazione da qualsiasi modulo (tranne dove indicato) attraverso i seguenti mezzi:
Utilizza le scorciatoie da tastiera nel flusso di lavoro di esportazione il prima e il più spesso possibile. Saranno una seconda natura prima che tu te ne accorga, e sono grandi risparmiatori di tempo.
Passaggio 3: configurazione delle impostazioni per soddisfare le tue esigenze di output
La prima scelta che farai è se prevedi di esportare sul tuo disco rigido, su un masterizzatore CD/DVD (se ne hai ancora uno!), un'e-mail o un plug-in di esportazione che hai installato. La tua scelta più comune sarà Hard Drive. Da lì si configurano tutti i pannelli relativi alla scelta effettuata. Sebbene appariranno pannelli aggiuntivi con diversi plug-in di esportazione, sono troppo specifici e vari per essere trattati qui; Mi concentro solo sui pannelli forniti con il disco rigido, poiché copre la maggior parte delle opzioni.
IL PANNELLO DELLA LOCALIZZAZIONE DELL'ESPORTAZIONE
Il pannello Posizione di esportazione, mostrato qui, viene utilizzato per configurare dove si desidera salvare un batch di copie sul disco rigido. Anche se alla fine masterizzi queste copie su DVD o le trasferisci a un'altra applicazione, Lightroom Classic deve prima salvare le copie sul disco rigido.
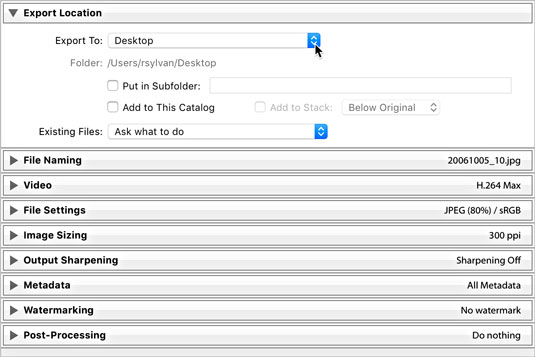
Il pannello Posizione di esportazione si è espanso.
Il punto in cui scegli di salvare i file è determinato da due fattori: come gestisci i tuoi file e cosa stabilisci che deve essere il tuo output. Il menu a discesa Esporta in fornisce alcune opzioni per designare una posizione:
Dopo aver scelto la posizione per l'esportazione, hai alcune opzioni aggiuntive da considerare:
Poiché puoi esportare le foto in una cartella che contiene già altre foto, devi indicare a Lightroom Classic come gestire le situazioni in cui le copie esportate hanno lo stesso nome e sono dello stesso tipo di file delle foto esistenti. Hai quattro opzioni nel menu a discesa File esistenti:
THE FILE NAMING PANEL
In many cases, you’ll want to maintain name consistency between your source files and your exported copies. By simply choosing the Filename template, you can achieve just that. Other times, you may want to use custom names that are completely different or perhaps some variation of the original name, as shown. In any case, because you’re always creating copies, you must tell Lightroom Classic how you want them named, and just as when you use the Import command or rename files in the Library module, Lightroom Classic uses filename templates to do it.
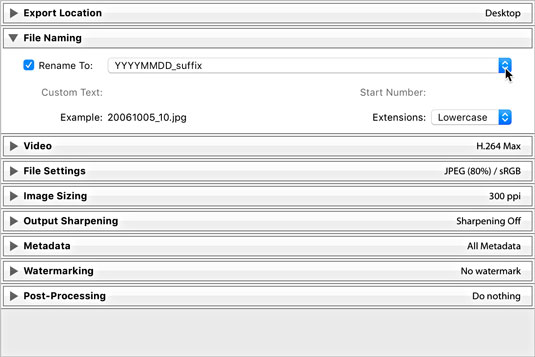
The File Naming panel.
Click the Template drop-down list and choose one of the installed templates, or you can click Edit and create a custom filename template using the good old Filename Template Editor.
THE VIDEO PANEL
If you have a video file selected for export, you need to check the Include Video Files check box to access the (limited) format options for video, as shown.
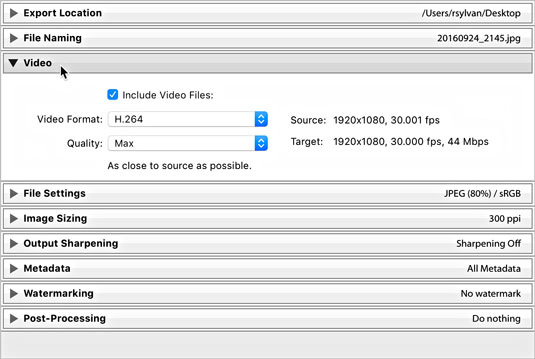
The video panel expanded.
THE FILE SETTINGS PANEL
Choose your file format based on your output needs (such as choosing JPEG for photos going on a website). Some formats require additional settings. Here’s a list of the formats and their options:
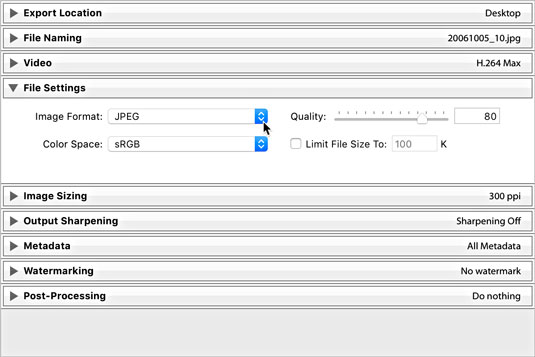
The File Settings panel expanded to show JPEG format and Quality slider.
Two additional options, which appear only when you choose JPEG, TIFF, and PSD formats, warrant a separate discussion. (Raw files are always 16-bit and don’t have a color space.)
THE IMAGE SIZING PANEL
Sometimes, you need to save your exported copies in a different size from the source photos, such as when you want to email them or put them in a web page. To do so, you use options in the Image Sizing panel (see the following figure). Lightroom Classic can make the exported images smaller or larger than the original images — a process known as resampling. The six options for resizing your exports are
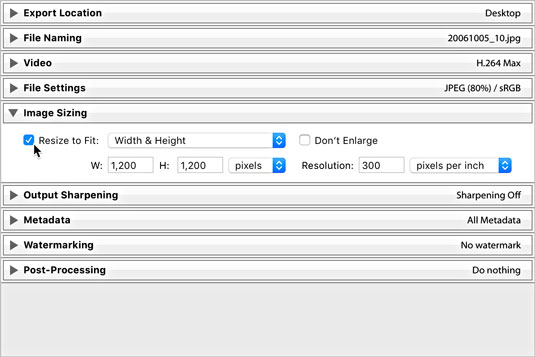
The Image Sizing panel.
Check the Don’t Enlarge box to prevent an image from being resampled larger than its original pixel dimensions. (This option is grayed out when Resize to Fit is unchecked.)
If your output needs require your photos to print at a specific size and at a specific number of pixels per inch (PPI), you can set its resolution value — the metadata tag used by software to determine how big the printed file appears. For example, the value of 300 PPI is commonly requested by print services, in which case you would enter 300 and choose pixels per inch. 300 PPI is always a safe choice, but if your photos are destined for the web only, this value is meaningless and can be ignored.
THE OUTPUT SHARPENING PANEL
I love having the ability to add sharpening tailored for the specific output destination as part of the export process. The Output Sharpening panel, shown in the following figure, is where you choose and configure your output sharpening settings. The possible output settings are defined as
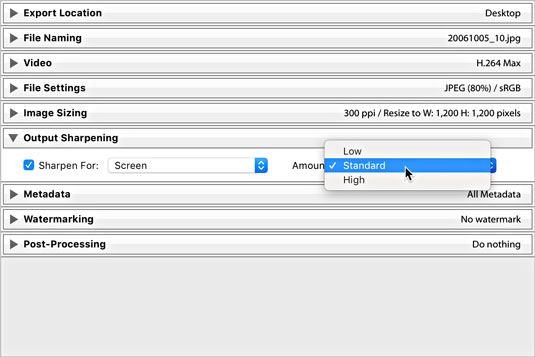
The Output Sharpening panel.
After you identify the output you are sharpening for, you can set the amount of sharpening to apply; your choices here range from Low (almost none) to High (often too much), with Standard in the middle (just right).
THE METADATA PANEL
The Metadata panel, shown in the following figure, allows you some level of control over what metadata is included in the exported copies. Clicking the Include drop-down menu offers the following options:
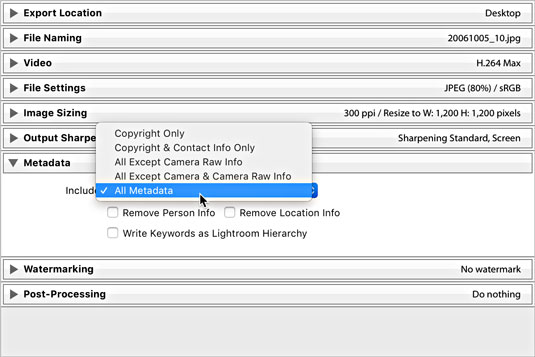
The Metadata panel expanded.
Th Metadata panel has three additional check boxes:
THE WATERMARKING PANEL
You can apply one of three types of watermarks to exported copies. Check the Watermark box to enable the drop-down choices. The most basic is the Simple Copyright Watermark, which pulls the information from the Copyright field of each file’s metadata and renders it as a watermark in the lower-left corner of each exported copy. This type of watermark has no configuration options.
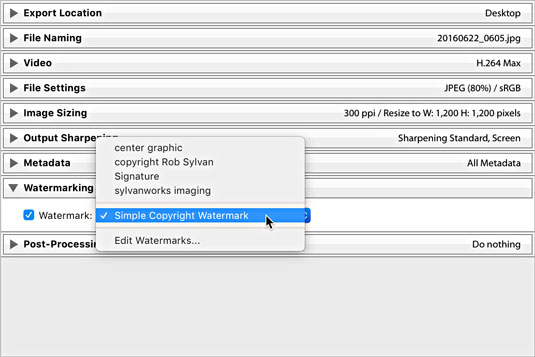
The Watermarking options.
For greater control, choose Edit Watermarks to enter the Watermark Editor, where you can create either a text-based or graphical watermark with more control and save it as a preset for easy reuse.
THE POST-PROCESSING PANEL
This is an optional panel, but it can provide a nice productivity boost to your output when you know your photos are going to be opened in some other application after they have been created (such as for additional image editing or viewing in your file browser). The Post-Processing panel (with the After Export drop-down list expanded) is shown in the following figure.
With the help of the options in this panel, you can tell Lightroom Classic to hand off your exported images to another application — in effect, having Lightroom Classic perform what is commonly referred to as an “export action” on your photos. The After Export drop-down list includes the following preinstalled options:
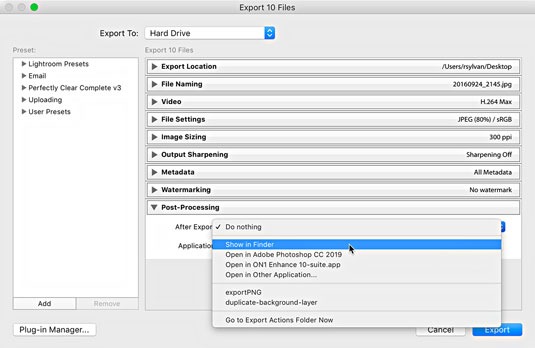
Post-Processing panel expanded to show After Export options.
At the bottom of the After Export drop-down list is the Go to Export Actions Folder Now command. Selecting this option opens Finder (or Windows Explorer for Windows) with Lightroom Classic’s Export Actions folder selected. You can place either an executable file or an alias (shortcut for Windows) to an executable file in the Export Actions folder to include it as an option in the After Export drop-down list the next time you start Lightroom Classic. This is another way to set things up so you can send your photos to a specific program or a Photoshop droplet with one quick command.
“What’s a droplet?” you say. A droplet is a Photoshop action that you manage to turn (with Photoshop’s help) into a tiny executable file. After you create a droplet, you can literally drag and drop photos on top of it to run the photos through the action automatically — a really powerful way to run a batch of images through a favorite action, such as applying a specific Photoshop filter, converting to an alternative color space, or applying a custom watermark. By including the droplet as an export action, Lightroom Classic automatically runs the exported copies through the droplet after they are created.
I preset sono un fantastico risparmio di tempo! Pensaci: puoi salvare un sacco di impostazioni comunemente usate e poi accedervi ogni volta che vuoi direttamente dal menu Esporta con Predefinito (scegli File → Esporta con Predefinito). Dolce!
Fare riferimento alla figura seguente per vedere il pannello Preimpostazioni: è lì sul lato sinistro.
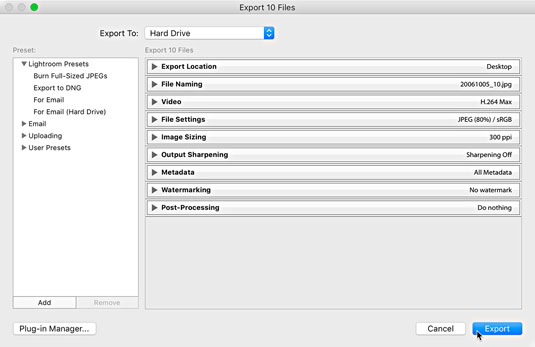
La finestra di dialogo Esporta.
Ottieni quattro preset preinstallati per iniziare, proprio sotto l'intestazione Lightroom Classic Presets - preset che non possono essere abbandonati o aggiornati, tra l'altro. Loro sono
I preset preinstallati non sono incredibilmente sofisticati, ma possono essere buoni punti di partenza e possono aiutarti a vedere le possibilità. Ad esempio, se ti piace inviare foto via email ad amici e familiari, puoi prendere il predefinito Per email come punto di partenza e personalizzarlo a tuo piacimento. Ecco come farlo:
Fare clic sul predefinito Per e-mail per caricare le sue impostazioni nella finestra di dialogo Esporta.
Espandi il pannello Impostazioni file.
Se preferisci un'impostazione di qualità più alta, imposta su 70.
Espandi il pannello Ridimensionamento immagine.
Se preferisci una dimensione in pixel più grande, imposta su 1000 pixel.
Espandere il pannello Nitidezza output.
Seleziona la casella Contrasta per e la schermata selezionata a un importo standard.
Lascia le impostazioni nei pannelli rimanenti così come sono.
Fare clic sul pulsante Aggiungi in basso a sinistra del pannello Preimpostazioni.
Questo apre la finestra di dialogo Nuovo preset.
Immettere un nome descrittivo nel campo Nome predefinito.
(Facoltativo) Crea una nuova cartella durante il salvataggio del tuo preset.
È possibile fare clic sull'elenco a discesa Cartella e scegliere una cartella preimpostata esistente o crearne una nuova.
Fare clic sul pulsante Crea per completare il processo e aggiungere il preset al pannello Preset.
Puoi eliminare i preset e le cartelle personalizzati evidenziandoli e facendo clic sul pulsante Rimuovi. Nota, tuttavia, che la rimozione di una cartella elimina tutti i preset al suo interno!
Puoi aggiornare i preset personalizzati con nuove impostazioni regolando le impostazioni come desideri, facendo clic con il pulsante destro del mouse sul preset e quindi scegliendo Aggiorna con impostazioni correnti.
Scopri come raggruppare e separare oggetti in Adobe Creative Suite 5 (Adobe CS5) Illustrator per migliorare il tuo flusso di lavoro creativo.
Scopri come avvolgere il testo in Adobe Illustrator CC per migliorare la tua creatività grafica. Segui i nostri passaggi dettagliati per un avvolgimento efficace!
Utilizza gli strumenti Fluidifica in Adobe CS5 Illustrator per creare distorsioni artistiche ai tuoi oggetti. Scopri come piegare e modellare le forme in modo creativo.
Scopri come esportare file JPEG e PNG da Adobe InDesign CS6. Guida dettagliata per migliorare la pubblicazione online con immagini di alta qualità.
Scopri come lavorare con le immagini in Adobe XD, incluso il ridimensionamento, la rotazione e l
Scopri come spostare e clonare le selezioni in Adobe Photoshop CS6 con tecniche aggiornate e trucchi utili per migliorare la tua creatività.
Puoi utilizzare lo strumento Istantanea in Adobe Acrobat CS5 per selezionare sia testo che immagini e creare un'immagine di una determinata area all'interno di un file PDF. Il risultato viene comunemente chiamato screenshot di una sezione all'interno di un file PDF. Il risultato è un'immagine e il tuo testo non è […]
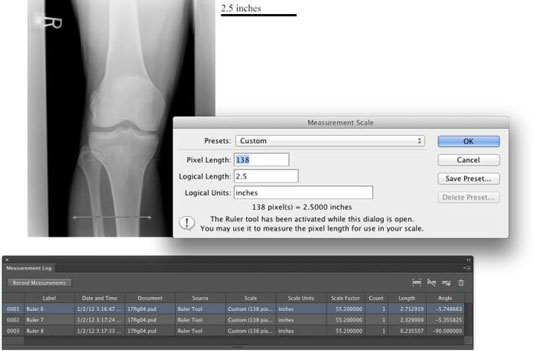
Progettato per ricercatori e scienziati, le capacità di misurazione in Photoshop CC sono piuttosto potenti. Puoi misurare qualsiasi cosa e contare il numero di qualsiasi cosa in un'immagine tecnica, magari da un microscopio o un telescopio. Se conosci la dimensione esatta di qualsiasi elemento in un'immagine, puoi scoprire praticamente qualsiasi cosa […]
Quando hai del testo nel tuo progetto Adobe XD, puoi iniziare a modificare le proprietà del testo. Queste proprietà includono Famiglia di caratteri, Dimensione carattere, Spessore carattere, Allineamento, Spaziatura caratteri (crenatura e tracciamento), Interlinea (interlinea), Riempimento, Bordo (tratto), Ombra (ombra esterna) e Sfocatura sfondo. Quindi esaminiamo come vengono applicate queste proprietà. A proposito di leggibilità e carattere […]
Puoi utilizzare InDesign per creare e modificare la grafica del codice QR. I codici QR sono una forma di codice a barre in grado di memorizzare informazioni come parole, numeri, URL o altre forme di dati. L'utente esegue la scansione del codice QR utilizzando la fotocamera e il software su un dispositivo, come uno smartphone, e il software utilizza […]

